Find Us:
77 Fernvale Rd
Brassall QLD 4305
(07) 3201 8630
Open:
Tue-Sun 9am - 4pm

Gardening after Rain
Gardening after deluges of rain can be hard but worth it for our mental health. Recent weather events have lead to our home gardens being inundated with large amounts of water. Unfortunately our productive gardens may not be exactly ready for plantings and other established plants are rotting in the ground. Here are some quick tips for gardening after the rain.
Gardening after deluges of rain can be hard but worth it for our mental health.
This morning while sloshing through mud and mumbling to myself about all my worries, I pulled weeds. The ground was wet and pliable and I just kept going until I realised my mental chatter had stopped and I was calm again.
Recent weather events have lead to our home gardens being inundated with large amounts of water. Unfortunately our productive gardens may not be exactly ready for plantings and other established plants are rotting in the ground.
Some quick tips for gardening after the rain.
Always wear shoes and gloves, never go into deep water
Deal with the big stuff first. Remove any rubbish that may have gotten into your gardens. With the wind and water flow I have found plastic containers, soft drink bottles and other general bits and bobs in my garden.
Clean debris out of Gardens, any broken branches excess mulch, stones ….
Wash foliage of plants covered in mud. A lot of my groundcovers have been covered in mud as the water is just flowing right over the top of them!
Check drainage lines, is there anything you can do to divert water or make water disperse quicker. I have found a few of my drains had mud in them still from last lot of rain we received.
Trim neatly any broken branches or limbs. Plants can handle a light prune but remember now is not the time for a garden overhaul. Plants are already stressed. Hold off major trimming or plant replacement until the weather behaves.
Check to see if plants are sitting in water. Wilting and leaf drop is a sign of stress not just from drying out but also from too much water.
Accept that some plants may have died. Many gardens around the Ipswich region are planted out with dry Mediterranean plants such as Rosemary and Lavender as well as dry Western Australian natives such as Grevilleas and Kangaroo Paw. Many of these plants can't handle having wet feet and then humidity for extended periods of time. Since these weather events aren’t consistent it doesn't mean changing your whole gardening style it just means accepting some losses.
Don't granular fertilise your gardens just yet. There may be more rain on the way and all that fertiliser may just runoff. Wait until we know for sure no large amounts of water on on their way. After a few weeks, you can give your plants a fertilise with an organic fertiliser like Organic Link
You can Liquid Fertilise. Once the heavy downpours stop I will be giving the nursery and my home garden a liquid fertilise with Plant Care and Neem Oil in Birchy. I will be doing this little and often until the weather starts to behave.
Buy some Beneficial insects or keep up with the neem and or pyrethrum. Insects are having an absolute ball in this weather and are multiplying faster than rabbits. This leads to them causing a lot of problems in my garden. I am regularly using neem oil as a preventive and when times get really tough, I spray with pyrethrum.
Apply Dolomite after this deluge of rain finishes. Calcium and Magnesium are water-soluble so your garden's soil will be very depleted of these trace elements. Dolomite is a great way to replenish these levels without affecting the pH of your soil. Low magnesium and calcium can affect many edibles as well as acidic loving plants such as camellias.
Mulch. Your gardens are wet make the most of it. Keep that dampness in and weeds down.
Don't forget to water your potted plants if they are undercover and can't get rainwater.
Try to enjoy being outside. We’ve been spending so much time locked up inside lately. Time to get out of the house and get some fresh air.
Art Auction Catalogue

Summer Afternoon
Oil on Panel 30cm x 40cm
Value: $495
Cynthia Copely: An Australian expressionist artist who captures the natural world through her interpretation of colour, feelings, and connection with the environment. She works primarily with watercolours and oils, creating vivid and emotionally charged landscapes.
Auction Item : Summer Afternoon
This eucalyptus tree is located at a beautiful winery, 'Lisdillon Estate' on the East Coast of Tasmania at Little Swanport. I spent a few days on the estate with my family whilst on holidays. It was a painter's paradise. I wandered to the property with paints and paper in hand, delighting in every glorious detail. They do a lovely drop of red too!
Oil on Panel, 30cm x 40cm
Value $495
Auction Item : Watercolour Tuition
Spend some tme with Cynthia learning Watercolour. 2 hours tuition for either a beginner or intermediate painter. Choose from fundamental watercolour techniques or take the next step if you're a painter wanting to expand your current watercolour skills. I can tailor the lesson to your interests.
Value : $195
Mel Sinclair: A passionate landscape photographer with a deep appreciation for Queensland's regional areas. She creates atmospheric imagery from around the world, though what she enjoys most is chasing fog in winter in the Lockyer Valley and Scenic Rim. Mel combines traditional and contemporary styles to craft images that inspire viewers to support local artists and appreciate the beauty of the world around us.

Majestic Snowgum
Digital Image on Canvas, 30cm x 45cm
Value $250
Auction Item : Majestic Snowgum
High up in the Australian Alps, among the hiking trails and wild brumbies, above Thredbo NSW, the mountainside is littered majestic snowgums. These trees are the most incredible natural colours and are twisted by the conditions in which they thrive. This image was featured in my 2022 solo show at Arts Alive Ipswich and was one of the most popular. It's perfect as a statement piece in a smaller space, somewhere it will catch the natural light.
Digital Image on Canvas, 30cm x 45cm
Value $250
Kylie Stevens: An Ipswich-based artist dedicated to showcasing the beauty of nature and inspiring viewers to protect our precious natural spaces. Her multimedia art practice expresses her deep connection with the environment.My arts practice allows me to express my deep connection with the earth. It is my aim to showcase the beauty and alchemy of nature, inspiring in the viewer a deeper respect for and desire to protect our precious environment. My recent work has focused on working with rivers, with a spotlight on my local rivers Urarrar (The Bremer River) and Maiwar (The Brisbane River).

Maiwar
Brisbane River water, copper leaf, ochre, limestone, charcoal and acrylic paint on canvas, 76cm x 76cm
Value $600
Auction Item : Maiwar
In my process river water thins my paint, allowing it to pool and travel across the canvas, with the addition of hand-ground ochres and charcoal the canvas is marked, giving control to the river in this stage of the work. Then I map the river in charcoal and copper leaf upon the richly textured surface. Using the natural elements of river water and earth in the work gives it an essence of the place it represents.
Brisbane River water, copper leaf, ochre, limestone, charcoal and acrylic paint on canvas, 76cm x 76cm
Value $600
Kate Roberts: An artist whose journey spans various mediums, with a special focus on metal and silversmithing. Her artistic exploration and experimentation with different materials make her craft a constant adventure.
Auction Item : Decadence – Lavish Attachment

Lavish Attachment is a Copper, Sterling Silver and Crystal brooch, which can be worn with a necklace.
Value $350
Decadence can be 2-edged sword! We as the average person strive to have a little decadence in our lives, to savour and enjoy on special occasions. Yet if allowed to dwell in the in indulgent decadence as a part of our everyday lives, it brings our world and the wider society to questionable decisions that can bring about certain ruin. This dwelling in decadence has led to recent turmoil in local leadership and the fallout continues to affect the average person who still just wants a small experience of a little decadence. This piece is designed for just that, within a humble earthy background of copper.
Lavish Attachment is a Copper, Sterling Silver and Crystal brooch, which can be worn with a necklace.
Value $350
Auction Item : Ring making class for 2 people
Ring making class for 2 people
Workshop - 3hr
Materials and equipment included
Value : $250
Amanda Wachevski (IPSWICH PHOTOGRAPHY STUDIO) : Amanda Waschevski has established a reputation for empowering, inspiring and innovative portrait photography. A visual celebration of individuality - Ipswich Photography Studio.
Auction Item : Portrait Session

Portrait Session
THE RED CARPET EXPERIENCE!
Perfect for business owners, creatives and other detail-oriented folk looking to take their online presence to the next level, and be seen for who they are, not just what they do.
What’s included:
In Person Consult | Personalised Planning Session
All the Time you Want
All the Guidance you Need
Unlimited background & wardrobe changes
Value : $625
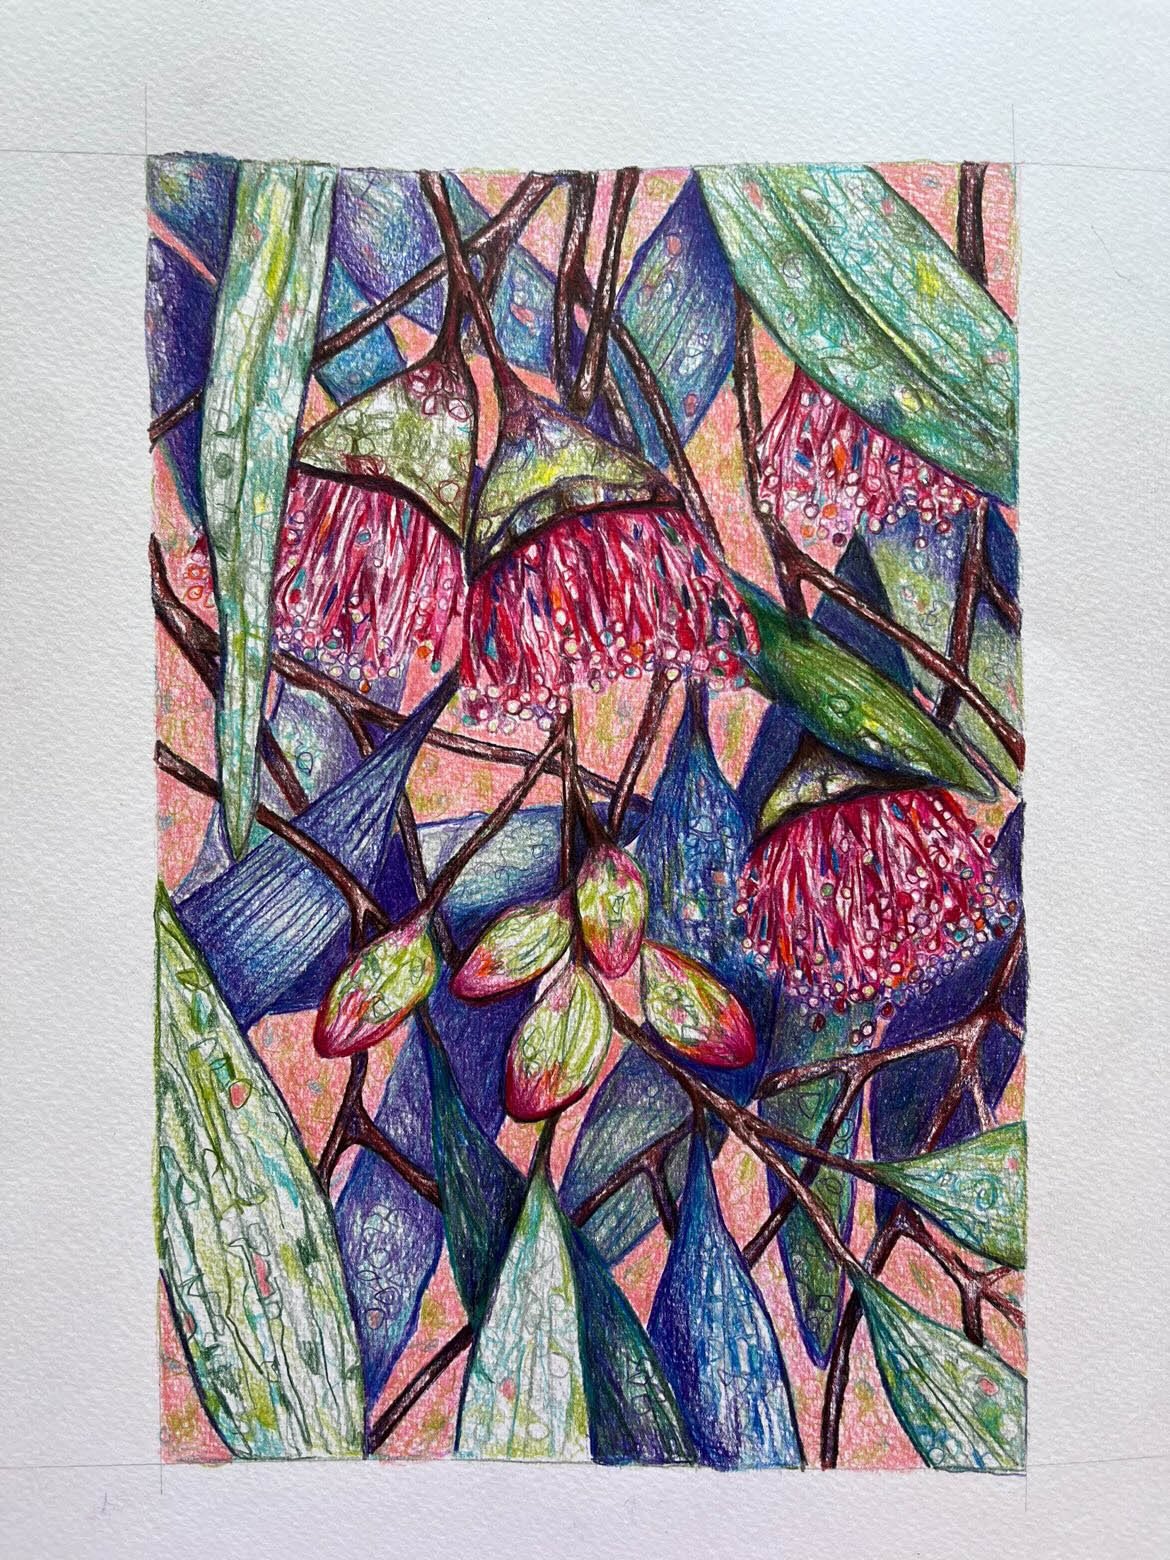
Jodi Bowen (LONE GOAT STUDIO): A creative force that brings quirkily beautiful ceramic art and decorative pieces to life. Her works are handmade with love and often carry a touch of humour and a sense of the quirky.
Auction Item : Pink on Pink
I love the colour of the Australian landscape. Native flora provides bursts of colour contrasted by shadows and the pink sunsets of late. It is so captivating.
Oil pencil on paper. 15.5cm x 23.5 cm.
Framed and ready to hang.
Value : $250

Amy Stapleton: An emerging artist who draws inspiration from the natural environment to create contemporary, mixed-media landscapes. Her work blends traditional materials with a modern touch, incorporating elements of photography and graphic design.
Auction Item : It's All Changed Now
This piece is from Amy’s personal collection and is called “it’s all changed now” as this is what College’s Crossing used to look like before the devastating 2011 floods.
Mixed media on timber panel in oak frame.
30cm x 40cm
Value : $250

Brisbane Story
$300
Andrea Baumert Howard (ART BEFORE HOUSEWORK): A multi-disciplinary artist who finds inspiration in everyday moments and believes that art and beauty are all around us. Her work is born from ideas that persist until they materialize into reality. Andrea’s backyard studio allows her to get messy and follow any direction inspiration takes her. She is currently obsessed with handmade recycled paper. She uses shredded junk mail and office discards, dyed with inks and natural materials to create multilayered papers. Every sheet of paper is individually crafted in the mould, hand coloured and mixed in the vat. The delicate nature of the handmade paper is tested in the extreme when put through a printer, sometimes a whole piece falls apart, and she usually only gets one try. Her love of nature and environmental concerns are a strong theme in her current work. She hopes the use of recycled junk-mail and office paper, sparks conversations about recycling and mindful reuse of resources.
Auction Item : Brisbane Story
Digital Photograph on Handmade paper from Junk mail and office discards
Framed 47 x 57cm
Value : $300

Tree of Life
Beth Barrett: I am an Art Teacher with over 30 years of experience teaching children and adults. During this time, I have developed my own practice exploring the natural environment using a variety of mediums. Colour and shape would have to be the major influences in the development of an idea. My preferred medium is acrylic paint on cut timber giving me the ability to create a more tactile effect in the works. I like to draw with a jigsaw!
Auction Item : Tree of Life
For me, trees symbolise strength and connection between life and spirit. Each tree is unique and individual, its layers shaped by different experiences. This piece grew from a selection of timber off-cuts that would normally be discarded. Now, being reborn to reconnect and continue to create a calming presence.
Craved Acrylic on MDF Board
900 x 600 x 30mm
Value : $500
Rebecca Lewis (LITTLE BROWN DOG): Bec Lewis is a self-taught textile artist, seamstress, printmaker and collage enthusiast living and working in Ipswich, Queensland. In 2014 she held her first solo exhibition of at Cactus Espresso Bar. The show featured lino prints of local houses on old newsprint, timber and paper. Since then she has been exploring different ways to use her prints including traditional collage, outdoor or locative collages, stop motion animation and automaton. In 2018 she won the Queensland Regional Art Awards – Digital Art prize for a short stop motion film featuring her lino prints and paper cut outs. The prize was a week long residency at ‘The Edge’ at the State Library of Queensland. She used this week to experiment with simple automaton. Again ‘animating’ Lino prints but this time with simple hand cranked mechanisms. Bec has taught workshop in print making and animation from Brisbane to Biloela and regularly attends the GOMA Design Market with her screen printed wares.

Yellow-tailed black cockatoo automaton
Auction Item : Yellow-tailed black cockatoo automaton
Her latest work combines her love of Lino print and automaton with her fascination and admiration for Australian birds. Turn the handle to watch them fly.
2024
Hand printed fabric, wire, beads and vintage cotton reel
Value $250
Auction Item : Time with Bec
Come and hang in Bec’s garden studio for two hours. Would you like to have a crash course in screen print, Lino print or stop motion collage? You decide and we’ll make it happen.
All materials provided.
Value : $195

Handmade Teapot
Timothy Acutt Studio Potter and Visual Artist. With exhibits of his pottery, paintings and drawings in Ipswich and Brisbane.
Auction Items : Teapot
The form, functionality and aesthetics of the teapot is a constant challenge for the studio potter. My aim is to make teapots that are functional and also have a sculptural presence. I try to balance a defined form with a more immediate and spontaneous decoration.
Black stoneware teapot with thrown handle. 22cm x 23cm.
Value :
Auction Item : Day with Tim
If you have your own Pottery Wheel and are looking to improve your skills, Tim will come over for the day and give you some advice.
Value : $195

Caladium
Caladiums are grown for their beautiful leaves which appear in the warmer months from corms. The older and fuller in the pot or garden the better the leaf colour.
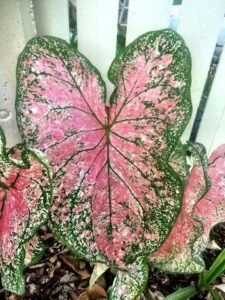
One of my all time favourite plants is the Caladium.
I have heard some people call caladiums garish, with their vibrant leaf colours, but I adore them.
I usually grow my caladiums in a shady spot in the garden, but I do keep a few in pots that I can bring inside during the warmer months, as it’s one of the best plants to have indoors during the heat.
Caladiums are known for their beautiful leaves which appear in the warmer months from corms. The older and fuller in the pot or garden, the better the leaf colour, so try not to split your caladiums too often.
Their foliage is absolutely amazing and constantly changing, plus they get bigger and better every year. Their leaves can range in size from about 10cm to about 50cm and the colour can range from transparent, pink, through to dark vibrant red with splashes of green. There are so many colour combinations I don’t think I could ever collect them all … I do plan on trying though!
To gift a Caladium means you are gifting the recipient joy and delight in their lives and this is exactly what caladiums do for me, bring me joy and delight.
As soon as they start to pop up from underground and show their foliage off, I bring the pots inside. They will survive inside in a well lit area and I find the darker the spot the less colour the foliage gets. They also don’t like cold houses, so try to find a warmer spot.
They adore the heat and humidity and they don’t require a lot of water, about once a week during the really hot times and the ones in the garden get watered and treated the same as all other plants.
I use them all throughout the house at this time of year to add colour to a sometimes solely green landscape.

When the cooler weather approaches and they start to die down, I put the pot back outside in a warm shady spot and leave it alone until it pops up again next year.
If you are growing your Caladiums in the ground, I don’t ever pull them up when they die down. I find the older they get, the better they look. As soon as the nights start to warm up, these beauties will pop up from underground to surprise you with their colours and then as the nights start to get too cold they will slowly disappear again....
I try to fertilise my Caladiums in August, just before it starts to get warm, with Organic Link. Through their growing season, I alternate liquid fertilising them with Silica and Potash and Triple Boost.
I love the way caladiums can instantly lift my mood with their tropical feel and I think they add a colourful, magical touch to your garden.
Caladiums are available at Trevallan from November to March
Red Poinsettia, Euphorbia pulcherrima
Poinsettias are amazing plants. They will grow in full sun, full shade, indoors or outdoors. They can handle most soil types, the cold, the dry, the heat.
I thought I’d talk about one of the most commonly used Christmas indoor plants, the Red Poinsettia, Euphorbia pulcherrima.
While this beautiful plant is native to Mexico and Central America, it has well established itself into Australian culture, to the point that when Brisbane City Council was formed on 1 October 1925, the red poinsettia was chosen as the floral emblem!
Poinsettias are amazing plants. They will grow in full sun, full shade, indoors or outdoors. They can handle most soil types, the cold, the dry and the heat. For this reason, I’m amazed we don’t use more of them in our gardens.

Poinsettias at Pohlmans Nursery around October
For me, there really is nothing finer than the sight of a poinsettia naturally blooming. I remember the first time I saw a hedge of Poinsettias in colour, it was going up both sides of a driveway out at Lowood. Oh my, it took my breath away.
Did you know that what we think are the ‘flowers’ of the poinsettia are actually ‘bracts’ or clusters of coloured leaves. The coloured part is actually leaves that have changed colour. The real flowers are insignificant and found in the centre of each of these clusters.
The colour pigmentation of these bracts is triggered by the shorter periods of sunlight that the plant experiences during the winter months. That’s right, the natural time for a Poinsettia to flower is winter. Short days, long nights!
Why do we associate them with Christmas if they flower in the winter? That’s an easy one to answer, because we have always been inundated with the Northern Hemisphere’s idea of a cold snowy Christmas.... they have Poinsettias flowering naturally at Christmas and for them it’s a bright bit of colour on a bleak outlook.
To make Poinsettias flower at Christmas, we need to adjust their lighting. I have included a picture of Pohlmans Poinsettias around October. They put these plants into special hothouses and adjust the lighting over the next few months to bring them into colour. The next picture is what the same room looks like in December!
Poinsettias come in all different colours, it’s just we normally associate red ones with Christmas. However, I do love the hot pink and double bract ones.
Boss lady hates poinsettias as they can be deciduous in the subtropics after and sometimes during flowering time. As a result, some years results in a shabby plant and other years, if it’s a dry summer, you get a full, thick plant. She never knows what they will look like and it annoys her!

The same Poinsettias at Pohlmans Nursery in December
While there are ‘dwarf’ versions of Poinsettia on the market, you still need to trim them back every few years to keep them looking neat. I find if I trim them back harshly at end of winter and give them a good feed of Organic Link fertiliser, they are usually looking lush by October. When trimming, it’s important to know that these plants have a milky sap that can be irritating to some, but more importantly, can ruin your clippers. So make sure you wear protective gear and always thoroughly clean your clippers afterwards.
As mentioned before, I have found Poinsettias will grow anywhere. Pots, the garden, indoors or outside. If planting them in a pot, always use excellent quality potting mix and don’t over pot. If planting them in a garden, use excellent quality garden soil. Never plant your Poinsettia near a street light or an outdoor light that is constantly on, as they will never change colour. I find using Poinsettias in the garden is a great way to make a dark green space bright during our bleaker months of the year.
This Christmas enjoy your red Poinsettia inside and then go plant it in the garden so it can do what it does naturally.

Mastering Water-Wise Gardening for a Dry Summer
Creating a water-wise garden involves choosing the right plants, caring for the soil, and watering effectively. Healthy soil is essential for proper hydration, and deep watering promotes robust plant roots.
The warm days beckon irresistibly, coaxing you outdoors. No matter how hard you try, you simply can't resist the gentle caress of the spring sun.
You peer across your yard through half-closed, dreamy eyes, sensing the resurgence of life after winter's dormancy. Deciduous trees unfurl fresh buds, infusing vibrant colors into the landscape, while flowers burst forth in an explosion of hues.
The transformative power of nature on our mindset is undeniable. Even without the backing of scientific research, it's difficult to imagine anyone who doesn't relish the simple joy of being outdoors, whether it's sinking toes into sandy shores or wading through the lush, rainforest undergrowth. I wholeheartedly believe that spending time in nature is essential for nurturing our well-being
As the warm days coax us outdoors and we revel in the beauty of nature, tending to a garden can become a little daunting, especially as we approach the warmer months. Uncertainty may creep in, particularly concerning how much water our gardens will require.
However, here's the good news: it is entirely possible to cultivate a stunning garden that also conserves water.
Creating a beautiful, water-wise garden involves three key components:
Selecting the Right Plants: Assuming you've already chosen the appropriate plants for your space, this step ensures that the plant selection aligns with your local climate and water availability.
Providing Proper Soil and Plant Care: To achieve a water-wise garden, it's essential to nurture your soil and plants optimally. This includes enriching the soil with organic matter, mulching to retain moisture, and practicing prudent pruning and maintenance to promote plant health and water efficiency.
Watering Wisely: The final piece of the puzzle is watering correctly. This involves understanding your plants' water needs, implementing efficient irrigation methods, and adhering to watering schedules that prevent overwatering while ensuring your garden thrives.
By addressing these three components, you can cultivate a stunning garden that conserves water and thrives in harmony with your local environment.
Nurturing Your Soil and Plants
Just as a garden is a dynamic, ever-evolving landscape, it requires a steady infusion of organic matter to thrive. Organic matter serves as the lifeblood of fertile, productive soil, playing multiple vital roles in supporting plant growth. It acts as a nutrient reservoir, fosters soil structure, enhances nutrient exchange, retains moisture, prevents compaction, reduces surface crusting, and promotes efficient water infiltration into the soil.
To infuse your garden with organic matter, consider incorporating:
Organic Compost: Whether homemade or store-bought, organic compost is a reliable source of organic matter.
Organic Mulches: Options like sugar cane, rainforest fines, and tea tree mulch not only conserve moisture but also break down over time, enriching the soil.
Organic Fertilisers: Use these to provide additional nutrients as needed.
In our gardens, we value the addition of Searles Compost, a registered organic compost specifically designed to jumpstart new plant growth and rejuvenate existing garden beds. Additionally, we recommend remulching with high-quality organic materials, such as sugarcane or one-inch hoop bark, every 12 to 18 months. This not only reduces water loss through evaporation by up to 73% but also continuously reintroduces organic matter into your soil, bolstering its water-retention capacity.

Ensuring Soil Hydration and Plant Health
Sometimes, despite our best efforts, the soil in both pots and garden beds can become hydrophobic. In such cases, soil wetters become a crucial component of maintaining a water-wise garden. These products facilitate water penetration to the plant roots, enhancing the soil's ability to absorb moisture and nutrients. This, in turn, fosters healthier and stronger plant growth. Soil wetters should be applied to lawns, gardens, and potted plants. At Trevallan, we offer a variety of soil wetters to suit different gardening needs.
The Key to Plant Health
The next step in achieving a water-wise garden is ensuring the health of your plants. Unhealthy plants demand more attention and resources. Consider using a complete organic fertiliser, such as Organic Link, every three to six months. These fertilisers promote robust, deep root systems that help plants endure growth phases, heatwaves, and dry spells.
Additionally, a fortnightly application of liquid organic based fertilisers like Triple Boost, Potash and Silica will further fortify your plants, contributing to their strength and vitality. Liquid fertilisers are applied directly to the plant's foliage and offer benefits such as reduced wilting, resistance to windburn, and heightened resilience in poor soil conditions. Your plants become more robust and less susceptible to pest infestations.
Effective Watering for Healthy Soil and Plants

Once your soil is in good health, proper watering is the key to maintaining a thriving garden. The most efficient approach is to install a high-quality watering system (using drip and misters as well as moisture sensors) and consistently use it.
However, if you prefer hand watering, follow these steps: water your garden as usual, then return approximately 30 minutes later to check the depth of moisture penetration. It's essential to ensure that the soil is adequately wet down to a depth of at least 30cm. If not, you'll need to water again, ensuring proper saturation.
Regularly providing a thorough, deep soak for your plants promotes the development of deeper and stronger root systems, enhancing their resilience during dry periods.
Your garden can survive or thrive this season, it’s up to you!

Fungus Gnats
Fungus gnats, those pesky flying insects hovering around indoor plants, pose a threat to plant health in humid Australian climates. A blend of prevention and management keeps these pests at bay, preserving a healthy indoor garden.
Gnats is a general term used to describe a variety of small, flying insects within the Dipteran family.
Fungus gnats, in particular, are named for their affinity for fungi and their larvae often being found in damp or decaying organic matter, including soil where they can cause problems for plants. They are a common type of gnat that can be found in and around plants, especially in overly moist conditions.
Fungus gnats, can be problematic for plants. They lay their eggs in the soil, and the larvae feed on organic matter and plant roots. This can lead to several issues for plants, including:
Root Damage: The gnat larvae feed on the roots, causing root damage. This can lead to poor nutrient uptake and weakened plants.
Stunted Growth: As the roots are damaged, plants may experience stunted growth, yellowing leaves, and overall poor health.
Reduced Vigour: Gnats can stress plants, making them more susceptible to other pests and diseases.
Wilting: Severely affected plants may wilt or die if the root damage is extensive.
Prevent and Manage Fungus Gnat Infestations
Prevent
Avoid Overpotting: Overpotting, or using a container significantly larger than the plant needs, can lead to excess moisture retention in the soil. Fungus gnats thrive in damp environments, so using appropriately sized pots for your plants can help maintain the right moisture levels.
Understanding Plant Water Needs: Different plants have varying water requirements. Understanding the specific needs of your indoor plants is crucial. Some plants prefer to dry out slightly between waterings, and overwatering can create a conducive environment for fungus gnats.
Watering Techniques: Water the plants thoroughly but ensure that excess water can drain freely from the bottom of the pot. Watering from the top and allowing the excess water to drain helps flush out any accumulated salts or stagnant water that can attract gnats. It's important not to let the plant sit in water for too long.
Monitor Moisture Levels: Use a moisture meter, correctly, to gauge the soil's moisture content. This can help you determine when it's appropriate to water and prevent overwatering. Adjust your watering schedule based on the meter's readings.
Proper Soil Mix: Choose a well-draining soil mix that doesn't retain excess moisture. Aeration and good drainage are crucial to discourage fungus gnats and promote healthy root growth.
Cleanliness and Plant Hygiene: Regularly remove any fallen leaves, debris, or excess organic matter from the soil surface. Keeping the area around your plants clean reduces potential breeding sites for gnats.
Quarantine New Plants: When bringing in new plants, quarantine them for a few weeks to ensure they aren't carrying any pests. Check the soil and plant carefully for signs of fungus gnats before introducing them to your other plants.
Manage
Introduce Natural Pest Control: Introducing natural predators like beneficial nematodes or predatory mites into the soil is an eco-friendly way to control fungus gnat populations. These predators feed on the larvae of gnats, reducing their numbers and preventing infestations.
Neem Drench: Neem oil, has insecticidal properties and can be effective against gnats. Creating a neem drench by mixing neem oil with water and thoroughly saturating the soil helps deter gnats and disrupt their life cycle. Allowing the plant to drain completely after the drench is crucial.
Gnat Off and Similar Products: Products like Gnat Off and similar insecticides specifically designed to target fungus gnats can be effective in controlling infestations. Follow the manufacturer's instructions for application and usage.
Tanlin Drops: Tanlin Drops are a non-toxic and inert option for managing fungus gnats. They don't harm beneficial microorganisms in the soil while effectively deterring gnats. Follow the instructions for application and dosage provided with the product.
Maintain Cleanliness: Regularly remove fallen leaves, debris, and organic matter from the surface of the soil to eliminate potential breeding sites for gnats. A clean environment discourages infestations.
Isolate Infested Plants: If you notice an infestation, isolate the affected plant to prevent the spread of gnats to other plants. Treat the infested plant using appropriate measures, such as neem drench or commercial products, to control the gnats.
Monitor and Repeat Treatment: Keep a close eye on your plants and monitor for signs of gnats. If needed, repeat the treatment with neem drench or other products to maintain control and prevent reinfestation.
It's important to choose a management method that works for you and your plants.
Combining several of these preventive and management strategies can effectively reduce if not stop fungus gnat infestations in your indoor plants.

Understanding and Managing Azalea Petal Blight
Discover effective strategies to prevent and address Azalea Petal Blight. Keep your plants thriving with our expert insights and proactive solutions
Recently I have noticed a resurgence of Azalea plants exhibiting the characteristic symptoms of Petal Blight, scientifically known as Ovulinia petal blight.

This fungal infection, which primarily affects the azalea and rhododendron species, particularly targets their flowers. It results in flowers showing petal discoloration, water saturation, limpness, and eventual browning, while the flowers remain attached without falling off. It can have a substantial impact on both the visual appearance and the overall vitality of the plants.
The underlying cause of Azalea Petal Blight can be attributed to the fungus Ovulinia azaleae.
While this fungal infection typically thrives in humid environments, it's worth noting that other factors beyond humidity can contribute to its occurrence, even in less humid conditions.
Other Contributing Factors to Petal Blight Onset:
Several pivotal factors can influence the emergence of Azalea Petal Blight:
Moist Conditions: The presence of dampness, even in the absence of pronounced humidity, can create an environment conducive to disease propagation. Fluctuating watering practices, alternating between overwatering one week and underwatering the next, can also pave the way for potential issues.
Impeded Air Circulation: The absence of sufficient air movement around closely situated plants can lead to an environment amenable to fungal proliferation.
Water splashing: Consistent overhead watering, especially in the late afternoons in winter (whether from rain or watering), can spread fungal spores and cause infections.
Reservoirs of Infection: Pieces of decayed and infected flower parts on the ground can hold fungal spores, making it easy for the infection to keep spreading.
Plant Health and Strength: When plants aren't doing well, they're more likely to get sick from harmful things like pests and diseases. Factors, like not getting enough nutrients, being planted incorrectly, or experiencing other kinds of stress, can all make plants more prone to getting Azalea Petal Blight.
Prevention is Better than the Cure
To lower the chance of Azalea Petal Blight and other similar fungal issues, it's really important to take some proactive steps:
Choose excellent quality garden soil or potting mix.
Ensure good air circulation around your plants.
Water at the base to keep those petals dry.
Clear away infected flower debris.
Regularly applying a soil wetter is beneficial since Azaleas tend to develop shallow root systems. This practice enhances water and nutrient absorption for healthier root growth.
Feed your plants by applying 'Organic Link' fertilizer every three months, and don't forget to give them liquid fertiliser regularly. To keep the soil healthy and moist, use organic mulch like sugar cane.
Managing Azalea Petal Blight
If you find your Azaleas have Petal Blight, you can use specific sprays like Mancozeb Plus or Eco Funguncide (certified organic) to treat it. However, it's worth noting that taking preventive measures is even more effective.
By following the gardening tips mentioned above, you can ensure the health and beauty of your azaleas and rhododendrons.
Want more information on Azaleas? Head here

My Favourite Gardening Task
Discover the unparalleled satisfaction of tending to your lawn. Dive into the myriad of positive attributes lawns bring to your garden landscape, from recreational spaces to mental well-being. Explore sustainable practices to enhance these benefits while minimizing environmental impacts.

Runs in the Family!
Warming the engine of the mower so my sister could mow on a cold morning!
My favourite gardening task is nurturing my lawn. I take immense pleasure in mowing it, finding it to be a job uniquely impervious to interference by others. Unlike cleaning a house that quickly gets dirty again, a mowed lawn can be seen for a least a few days and the sense of accomplishment I feel is indescribable. I love looking out or coming down the street and seeing my freshly cut lawn
To me, lawns form an indispensable facet of a garden's landscape, bearing numerous positive attributes that are nowadays often overlooked.
Recreational Space
Lawns offer a versatile space for outdoor activities - be it sports like soccer (our front lawn moonlights as a mini soccer field complete with its own built in goal), at home picnics or easy to clean up kids dinners, gatherings, or simple relaxation. A well-kept lawn invites people to be outside nature, whether it’s to engage in physical pursuits or just ‘chill’. You will often find my teenage son and his friends just chilling on our front lawn.
Aesthetic Appeal
Well-maintained lawns enhance the visual appeal of a property. They create a sense of order and cleanliness, contributing to the overall beauty of a landscape and increasing the curb appeal of homes and public spaces.
Stormwater Management
Lawns adeptly soak in and decelerate rainwater runoff, curtailing flooding and erosion risks. The lawn and soil function as nature's sponges, filtering and absorbing water before it reaches drains or water bodies.
Erosion Control
Lawns, when properly established with healthy root systems, can help prevent soil erosion. Their dense vegetation and root structure stabilise soil and reduce the risk of soil loss during heavy rains or wind.
Cooling Effect
Lawns can mitigate the urban heat island effect by reflecting sunlight and providing a cooler surface compared to paved/concrete/rock/fake turf areas. This helps maintain more comfortable temperatures in and around your home. I know how much cooler our front patio is since we created our turf area.
Mental and Emotional Well-being
A well-maintained lawn fosters mental tranquillity The sight of green and lush open areas lessens stress, instils calmness, and revitalises the mind. For me, it evokes strong emotions rooted in cherished memories of learning about gardening from my grandfather.
Air Quality Enhancement
Lawn grasses can ensnare airborne particles and pollutants, elevating the air quality within their vicinity. This leads to healthier, more breathable air. The difference is tangible; once our front yard evolved from a dirt patch, the home became less dusty and the air more invigorating.
I believe incorporating sustainable practices, like opting for organic fertilisers, water wise methods, and minimising pesticide usage, can amplify all these positives while mitigating the negative ecological and social impacts lawns seemed to have suffered over the last few years.

Chelsea Mowing at her old house
I firmly believe lawns don't necessitate extravagant expenses or environmental detriment for upkeep. They can be tended organically, and a well-rooted, robust lawn requires minimal watering. Maintained lawns are not onerous chores; they just demand consistent, manageable care.
While my lawns may not be in their prime currently, I employ simple, accessible organic techniques that anyone can adopt. Lawns, in their dynamic nature, thrive with regular but not excessive attention.
For me, a lawn is a key ingredient that adds that extra dose of joy to a household and completes the picture of a beautifully landscaped yard.

Streptocarpus
You want a plant that flowers most of the year, easy to look after, doesn’t mind being a little on dry side and survives in the shade? I have the perfect plants for you - Streptocarpus
You want a plant that flowers most of the year, easy to look after, doesn’t mind being a little on dry side and survives in the shade?
Honestly, is that too much to ask for?
Not when Chelsea, plant detective, is on the case!
I have the perfect plants for you - Streptocarpus

You may already know the amazing Streptocarpus caulescens. This beautiful plant used to be quite common; you have probably even grown it yourself or know someone that has it growing.
Streptocarpus caulescens are Nodding Violets.
This beautiful evergreen plant is so dainty. I find it works fantastically well in pots and hanging baskets. Just like its sister the African Violet, the Streptocarpus Caulescens doesn’t mind being a bit dry. It will grow and flower perfectly well in a warm shaded position. During the winter it can even handle a little morning sun. It doesn’t like heavy frosts.
The leaves are small, dark green and fleshy and the plant usually grows as a compact mass never really getting any higher than about 30cm. The flowers are the best part about this plant. Most of the year showy elegant, mauve-blue flowers are produced on long stems that hover or arch over the plant. This is where this beautiful plant gets its common name - Nodding Violet.
This plant has been bred tough, it’s us who baby it into being a not so tough plant. In the wild, species can be found growing on shaded rocky hillsides or cliffs, on the ground, in rock crevices.
Some of you may be thinking Nodding Violet, oh that’s so old fashioned. I want big bold flowers, not dainty flowers. So let me introduce you to Streptocarpus (hybrid) Ladyslippers®.
These Streptocarpus feature stunning large tubular flowers for most of the year in a variety of colours. These guys are just as hardy as their sisters just with bigger, bolder flowers and larger than life leaves.
I find they are best suited to hanging baskets or pots where you can get up close and enjoy their flowers. Just like their sisters they do prefer warm, well lit shady areas. You can bring them inside for short periods so everyone can enjoy their beauty. I like to have two (or three) that I swap around.
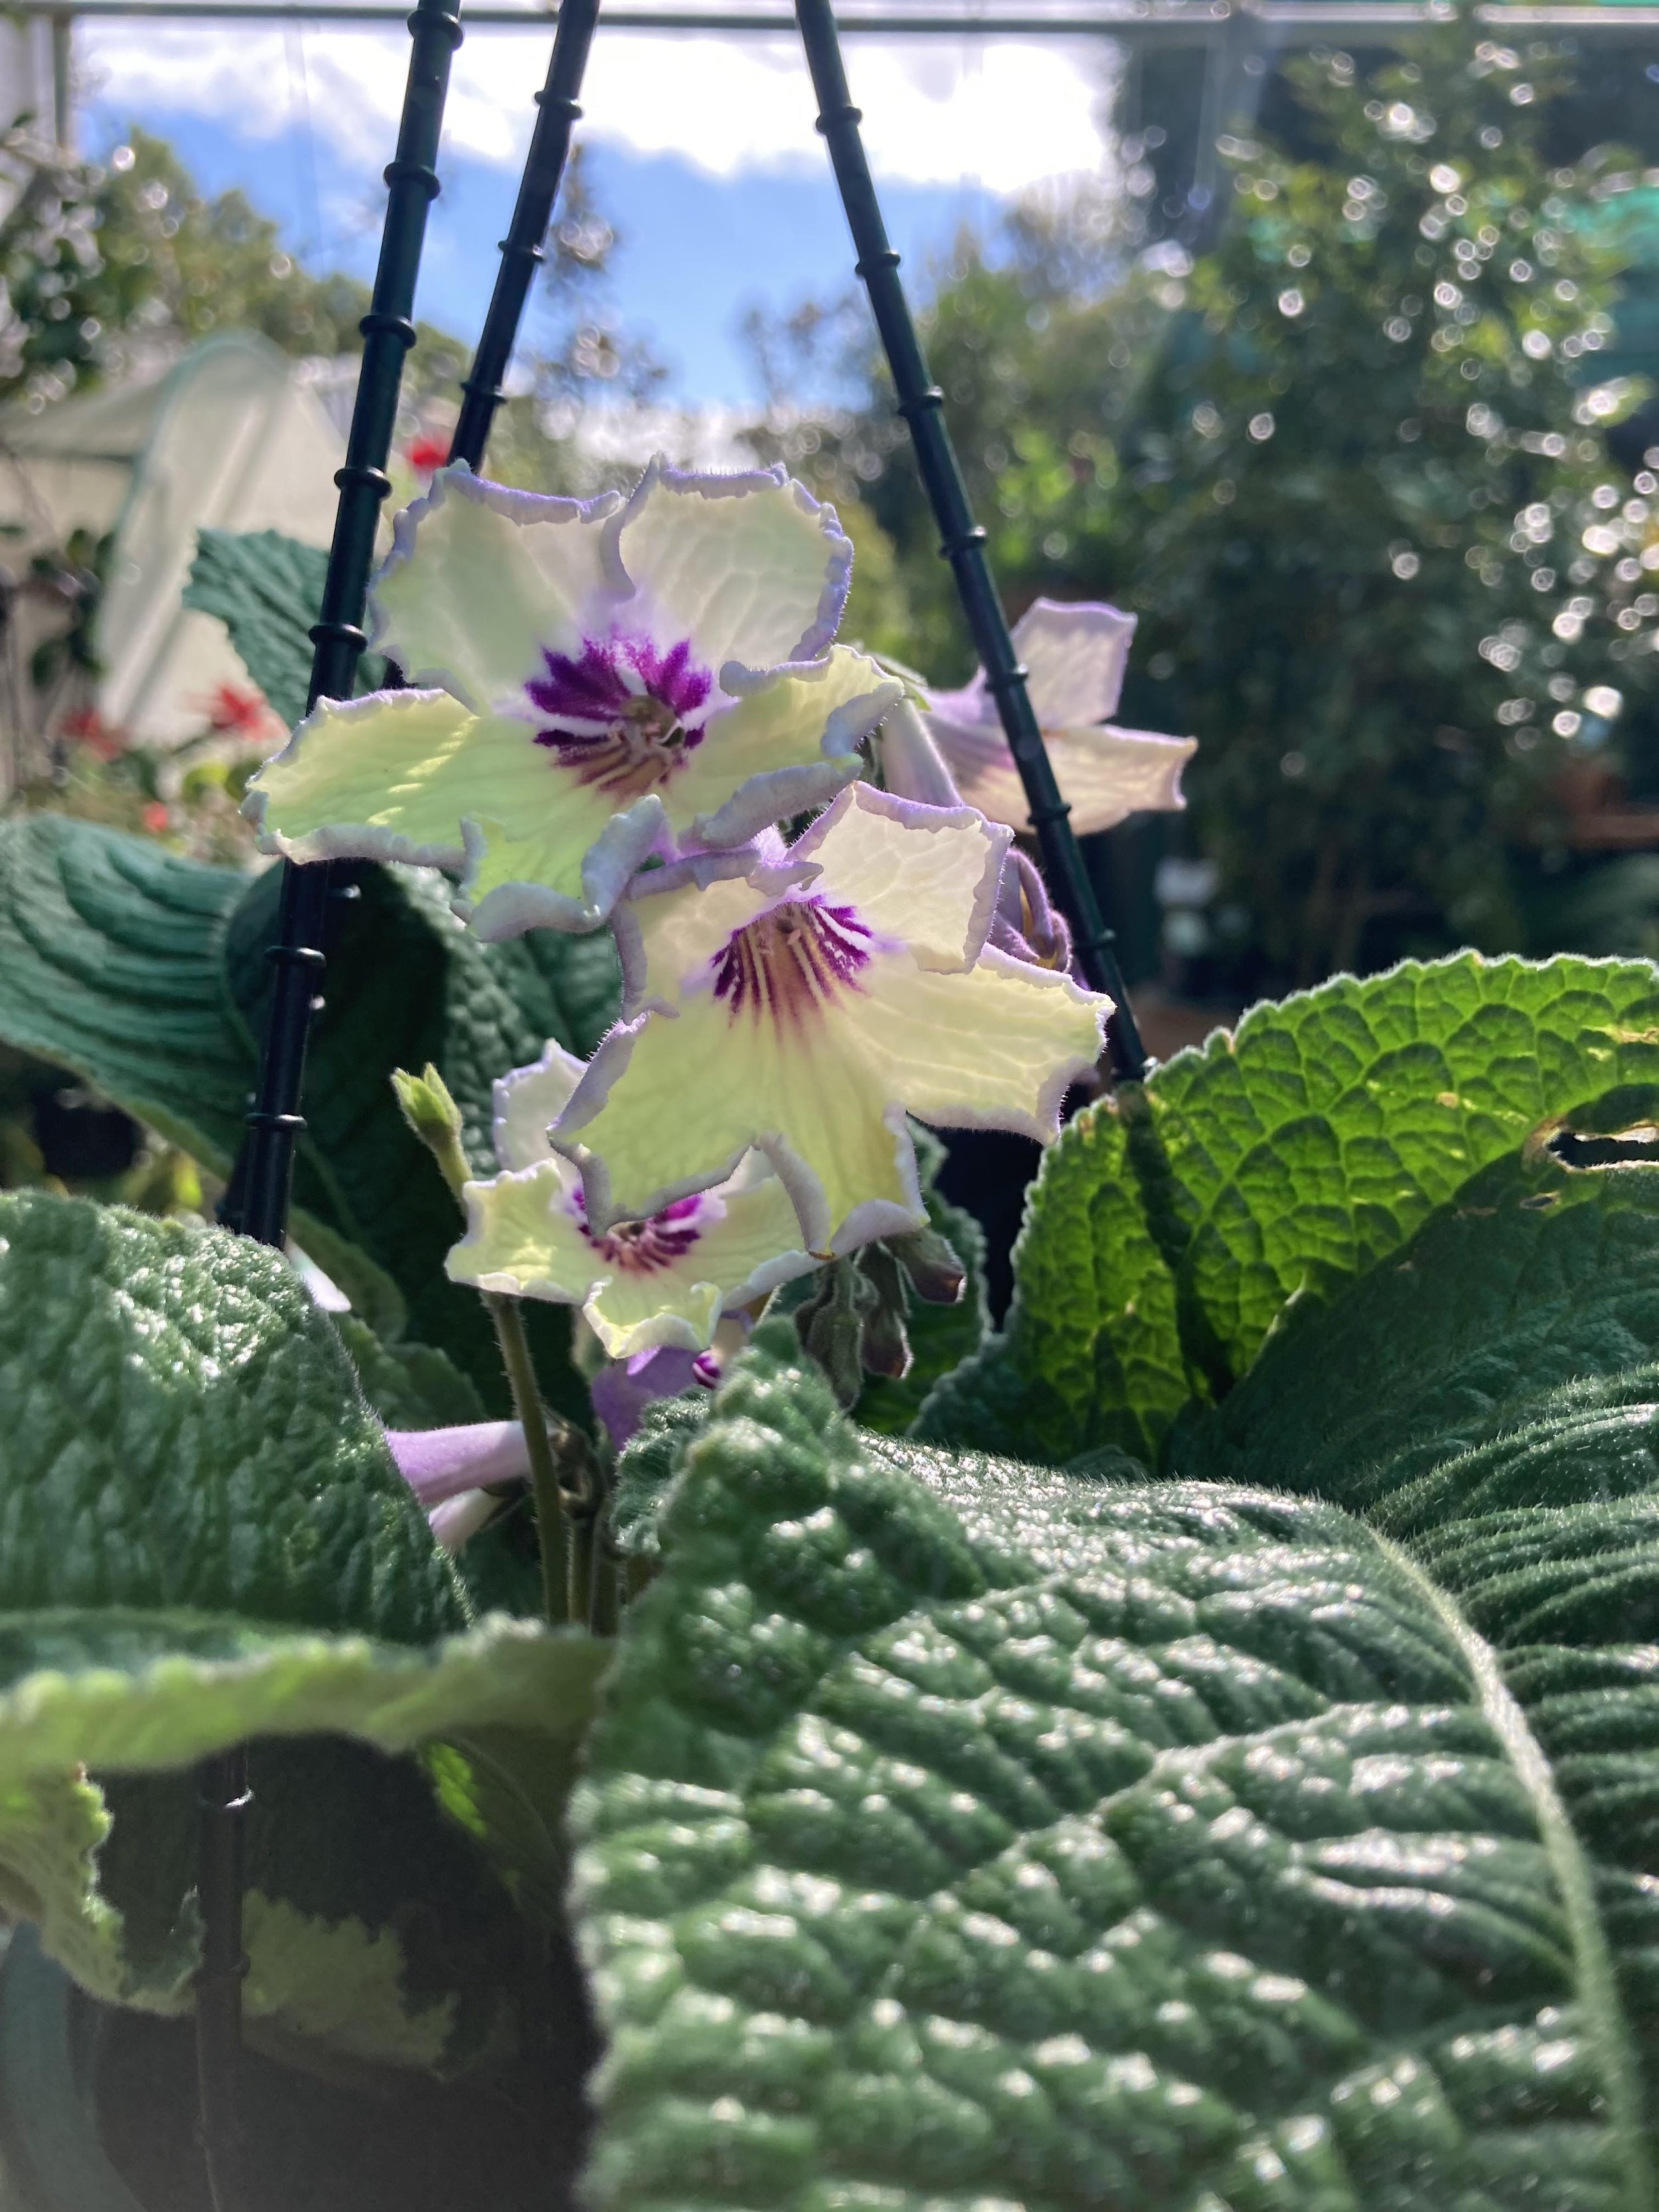
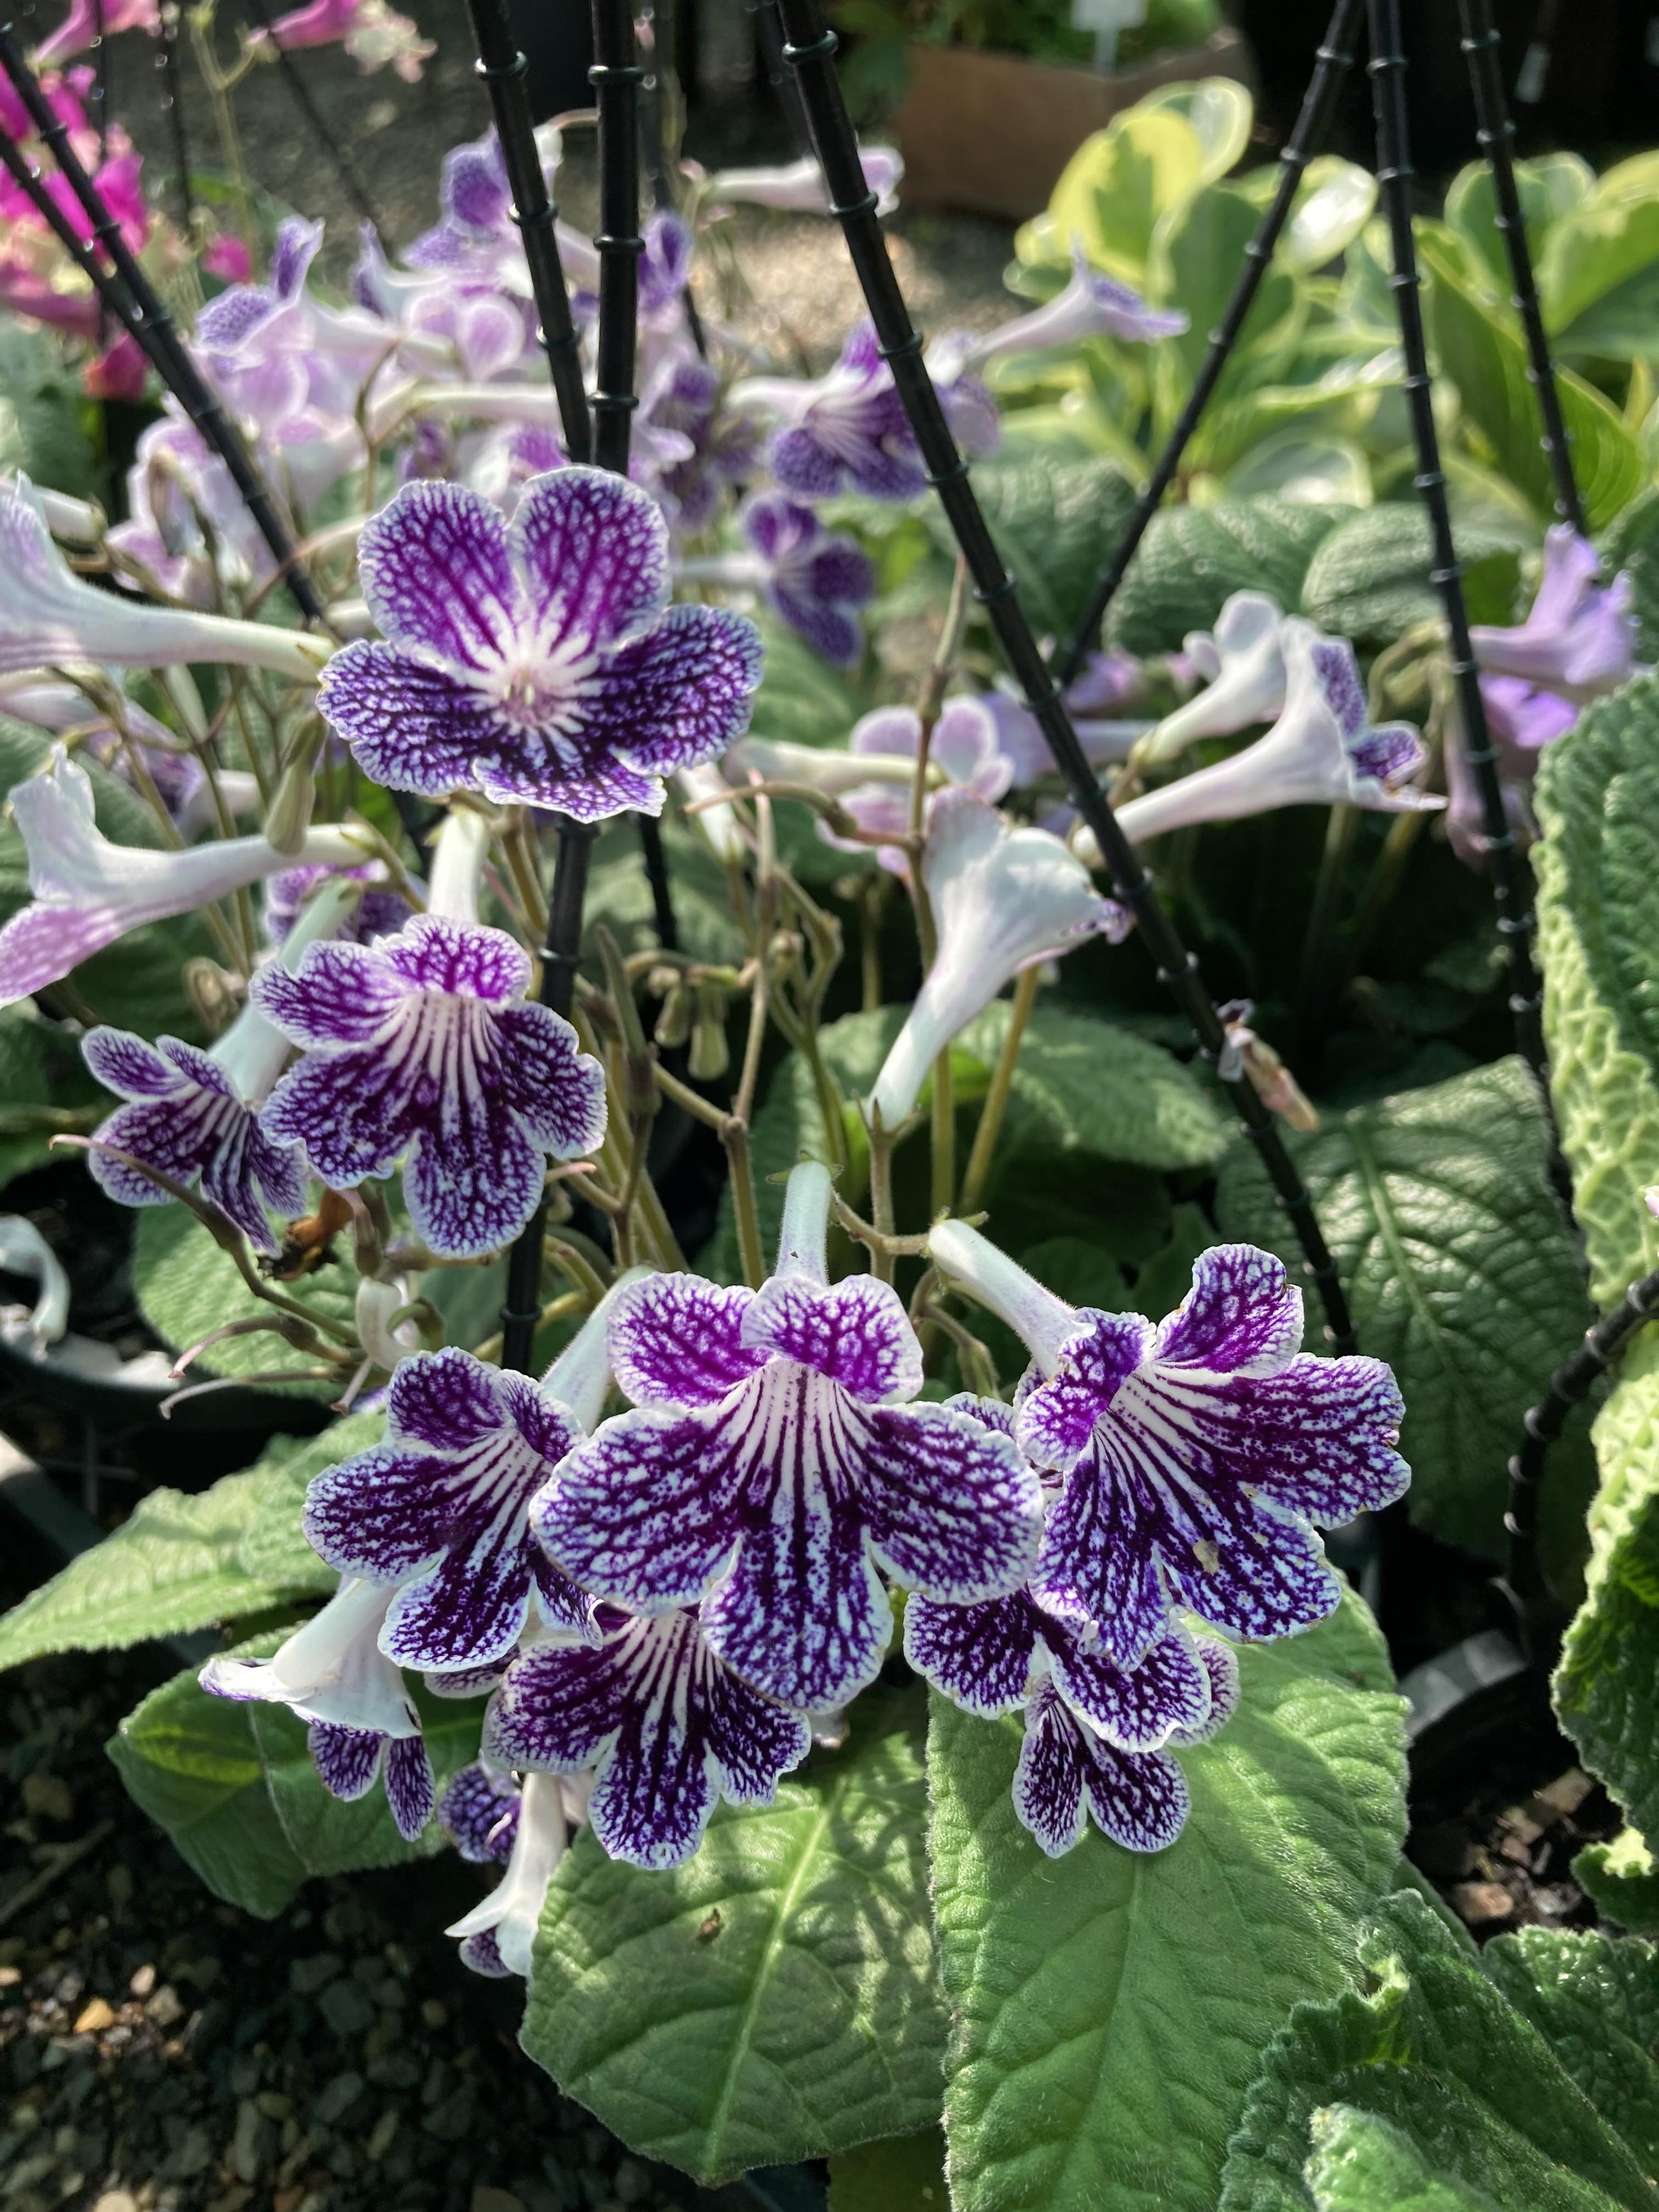
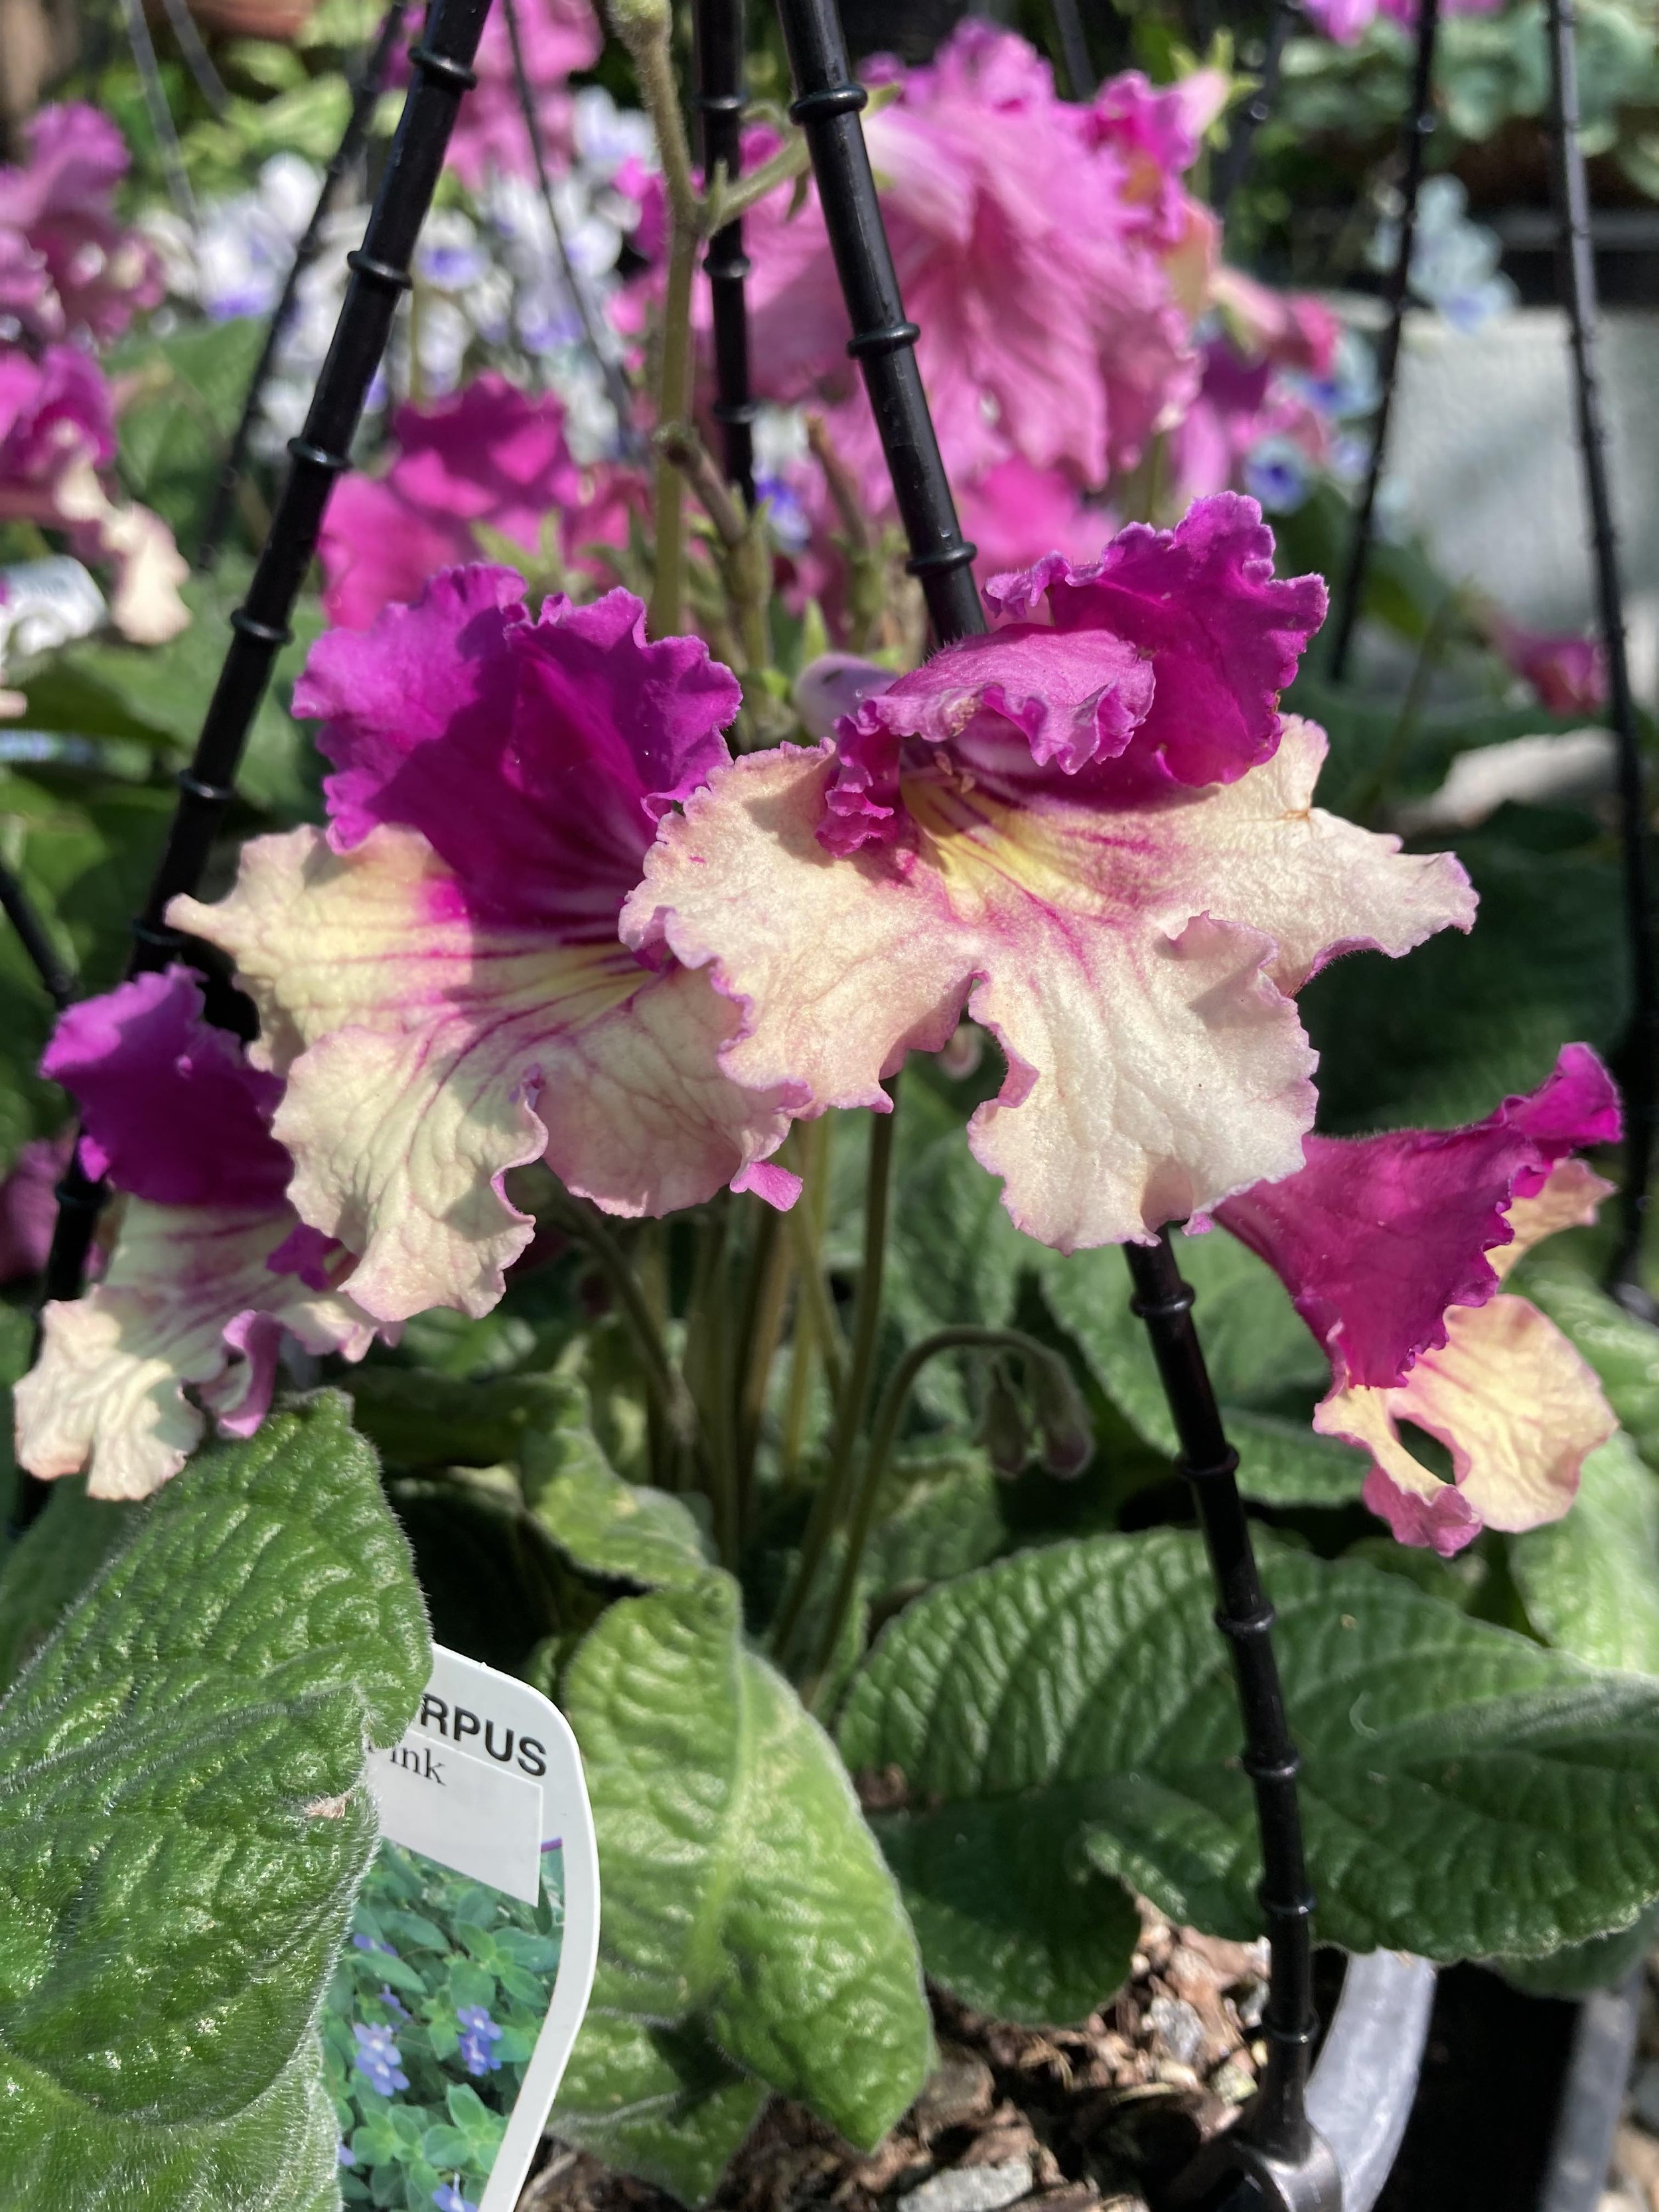
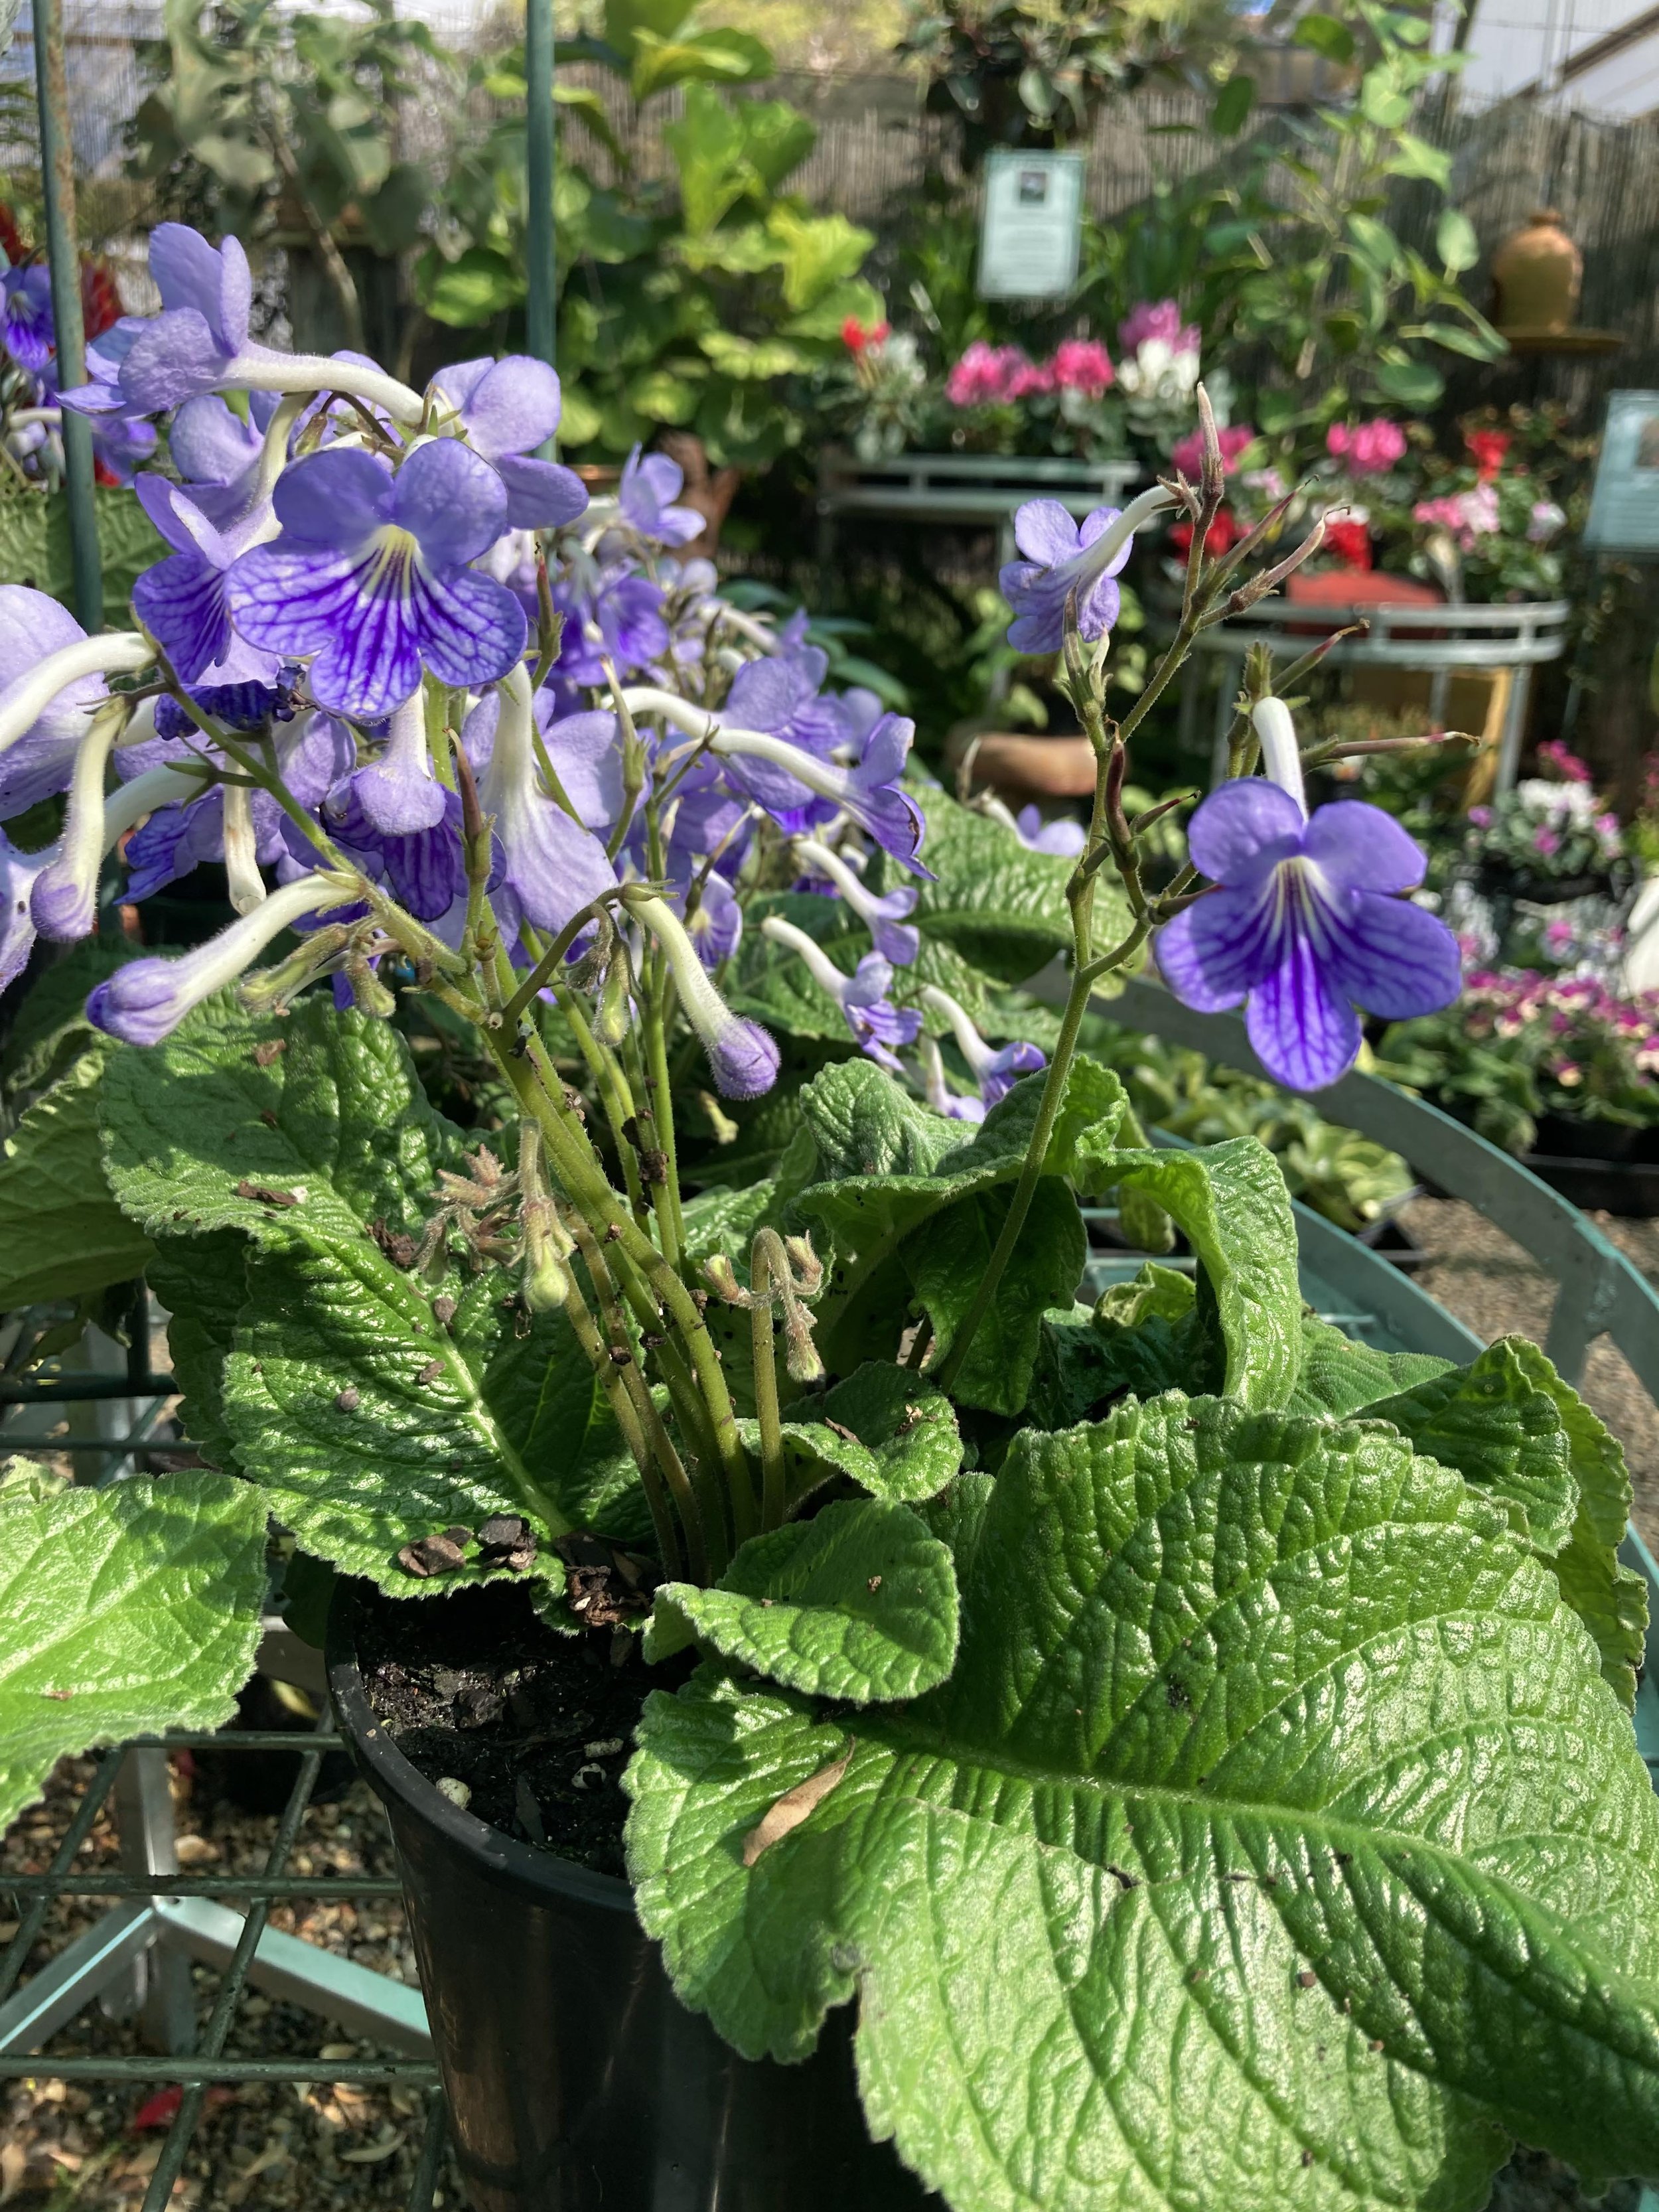
Even though this plant is tough and likes to dry out between waterings, I still would use the best potting mix - Searles' Platinum when planting it in pots or hanging baskets. It has great water retention and even though Streptocarpus don’t like to have wet feet I still use the best and just adjust my watering to suit the plant.
I always try to fertilize my plants at the turn of the season with Organic Link and I would try to alternate fortnightly the liquid fertilizers between Triple Boost and Silica and Potash.
So bring a little happiness to your shady area with these hardy plants that have show stoppping flowers!

Figgin’ Delicious
Figs, delicious and oh so nutritious. Easy to grow in South East Queensland. Learn how here.

Highly concentrated source of minerals and vitamins in one bite
I love figs. I fell in love at first taste. It was a wine and cheese tasting at Sirromet Winery. It could have been the wine talking but the love affair started that day and it has never waned.
While bought figs are nice, nothing compares to growing your own and eating it straight off the bush. They are so lusciously sweet with a texture that combines the chewiness of their flesh, the smoothness of their skin, and the crunchiness of their seeds. Oh my, almost sensual.
Ficus carica is a large, broad-leaved deciduous tree with many unusual features. It usually bears two crops a year and its flowers are hidden on the inside of a pear shaped, fleshy receptacle which becomes the fruit which we call ‘fig’. Figs are pollinated by wasps but don’t need the wasp to form fruit so they are classed as self pollinating.
Figs are oh so tasty and very nutritious, thank goodness with the amount I eat! They have the highest amount of calcium of any fruit, and 100g of dried figs contains 16% of the daily recommended amount.
Figs are also an excellent source of dietary fibre. Fruit fibre has been shown to significantly lower the risk of breast cancer in postmenopausal women. It is also very filling and can help to take the edge off appetite.
Figs are also a good source of iron, magnesium, potassium, B vitamins, as well as vitamin K. Figs contain different types of antioxidants and have been shown in studies to raise antioxidant activity. Antioxidants mop up free radicals, which may contribute to the development of cancer, heart disease and the visible signs of aging by damaging DNA and other body systems. The riper the fig, the more antioxidants it contains.

Fig leaves are also surprisingly healthy. Several cultures use the leaves in cooking, particularly to wrap meats and fish. Studies have shown that an extract of fig leaves will increase insulin sensitivity, and may be useful for preventing diabetes. Studies on animals have also shown that fig leaves can reduce the likelihood of heart disease and possibly kill cancer cells as well.
Figs were such an important fruit crop of earlier civilisations in the Mediterranean region and Asia Minor that the Greeks even created laws forbidding the export of the best quality fruit. Figs were also revered in ancient Rome where they were thought of as a sacred fruit. According to Roman myth, the wolf that nurtured the twin founders of Rome, Romulus and Remus, rested under a fig tree.
So many reasons to grow a fig.
The real question is who can grow one?
Figs needs a mild, warm climate and grow best in a sunny situation protected from heavy frosts.
A full grown fig can be over 5 meters high and wide. Don’t worry, they can easily be pruned to a more manageable size without affecting fruit crop. They can grow in pots or the ground. If pots is your only option the dwarf variety ‘Figalicious’ may be your best option.
Pruning your fig is very easy as they fruit on new growth so you won’t ever have to worry about losing a crop. The best time to prune is in late winter. During the first few years, you want to try to create a strong central leader with a few healthy main branches coming off that. These main branches will produce new growth each year that's capable of bearing the weight of the fruit. You can trim up to 50% off the tree if necessary in the first year or two to create a strong healthy tree. You can prune every year if necessary as a well pruned fig can last hundreds of years
Similar to other fruit trees, you should remove any dead, broken or rotten branches. Then you remove any crooked or crossed branches. Figs can produce suckers at the base of the tree. It is important to trim these away, you want to encourage growth within the main plant.
Figs have a thick, white, sticky sap that will be released when trimming, it can quickly gum up pruners and other tools so always keep a cloth rag and solvent on hand to clean tools regularly. Always use sharp tools when pruning as blunt tools don’t cut cleanly and will leave the bare ends of wood jagged and frayed, and this can create entry points for pests and diseases. According to Thomas Zimmer Moon Planting Guide you should try to prune your Fig on a waxing moon to promote new growth on fertile days (water signs).
After pruning always fertilise with Organic Link and once new leaves start to form a fortnightly liquid fertilise with Triple Boost would be beneficial. All fruit trees are heavy feeders so I try to Organic Link my fruit trees every two to three months.
When you plant your Fig tree out make sure you use excellent quality potting mix if planting in pots, we use Searles Platinum Potting Mix. If planting in the ground I use Searles Garden Soil. I add more compost every year to my garden planted fig and mulch with Sugar Cane.
Fig Brown Turkey
A vigorous fig that bears medium sized, richly flavoured figs with a sugary taste, brown skin and pinkish brown flesh.
The crop is usually produced over a prolonged period from summer to late autumn. Eat fresh or dried or use in jams and preservatives.
Fig White Genoa
A good bearer of large sized, long conical shaped, pale green fruit, flesh is reddish-pink with sweet flavour.
Can bear two crops a year. Used for fresh fruit, drying and jam.
Fig Black Genoa
A large sized, conical shaped, fig with purple skin and red flesh that has a very sweet rich flavour.
Can bear two crops a year. Used for fresh fruit, drying and jam.
Figalicious
A compact, small to medium sized tree that produces an abundance of delicious dark red fleshed fruit with purple-green coloured skin in summer. In a large pot will reach 1.0m high x 1.0m wide
Get healthy this year and grow a fig today. By the way they taste great with wine and cheese!

Mediterranean Gardens in Ipswich
I find garden design concepts like ‘Mediterranean Garden’ hard to give actual plants for as it’s a concept, a feeling especially in Ipswich’s ever changing climate and soils. No matter what your garden design is it should be a complete sensory experience and practical for YOU. Here are my tips for creating a ‘Mediterranean Garden’ in Ipswich
WHAT'S IN A MEDITERRANEAN GARDEN?
Sometimes I find garden design concepts like ‘Mediterranean Garden’ hard to give actual plants for as it’s a concept, a feeling especially in Ipswich’s ever changing climate and soils. No matter what your garden design is it should be a complete sensory experience and practical for YOU.
So what makes a Mediterranean garden?
Mediterranean gardens are designed to respond to their hot and dry summer and a mild wet winter/spring. They usually have shady areas (pergolas or shade trees), water (water bowls and features), outdoor entertainment areas (better to be outside than in), dry tolerant plants, oversized pots and urns and bright focal points in the form of plants or materials (cushions, ornaments, tiles, rugs). Let’s also not forget the two most important factors food and scent! Clipped hedging and topiaries are also a hallmark of Mediterranean gardens.
When designing your Mediterranean Garden or Courtyard we need to take all these important aspects into consideration.
While there are many plants that survive well in dry hot Mediterranean climate, we have to understand that Ipswich can get very humid as well as very cold and wet and other years we have hot dry summers and cold dry winters. It can make plant choices a little harder.
For us Ipswichians, I find a simple plant palate is best. Chose only three or four varieties of larger and forever plants that will handle almost anything and allow yourself some fun with plants that may not be forever depending on our weather.
A small garden or courtyard could contain a hedge of Olives or Bay trees loosely clipped, bright colour geraniums, or salvia filling the space and then boxed in with a Rosemary or French Lavender border. Citrus trees planted into large oversized terracotta pots and trimmed into loose topiaries and ivy geraniums spilling down the sides. Thyme could be used in between pavers or as a ground cover (living mulch). Mandevillas, Jasmine or Trachelospermum could climb over structures. If you don’t want plants climbing over structures, hang large hanging baskets of colour from your structures, overflowing with colour.
The area will also need clusters of Terracotta Pots containing your herbs and vegetables (Tomatoes, basil, oregano, salt bush, mint), grouping pots together in odd numbers always looks best. Go oversized and chose the best potting mix to help with water retention.
You will also need a large water bowl with a bubbler or even a pond with a small waterfall.
Brightly coloured outdoor rugs on the pavers to soften the harshness of the area and brightly coloured cushions on the chairs. Bright does not mean neon. Think nature’s colours – brilliant azure blue of the ocean, deep lush greens of plants, terracotta brown of the earth and bright shades of pink for flowers.
To finish off the area plant up terracotta bowls of mixed succulents and mixed bright coloured annuals. These can be switched up depending on the time of year and climate. Hot dry summers – go for succulents in the more humid weather go for bright coloured annuals.
In small spaces, keep it simple so it doesn’t look too busy. You can go multiples of the same but different for example citrus trees like a orange, lemon and mandarin as they all have similar growth and leaves. Geraniums all look the same but may come in different colours. If you use terracotta pots make sure all pots are terracotta. Different sizes and styles are fine but don’t mix one blue pot, one black and then three small yellows. Big is best. Lots of little pots can look messy and are hard to maintain. One big impressive pot is more ascetically pleasing than ten tiny ones.
Design it
I struggle sometimes to visualise exactly what I want! Many of you would have experience my design paralysis when you come into the garden centre and find the entire showroom demolished because I wanted to move a table. I find it’s best to start with a clean slate, boxes, spray paint and hoses.
Take everything away and clean the area until its sparkling, do any maintenance work on the area now. Fix retaining walls, add compost, pressure wash pavers. I then use the hose and spray paint to make out garden beds and then boxes are used as pots/plants to help you get a feel for things.
Work out what you want from your area. If no one cooks there is no point in having lots of herbs.
Do the big stuff first, get that hedge in, buy that big pot, get that oversized chair and cushions. You may not have the money right now to fill that big pot but it’s better to have the big pot and place it where you want it then not have it. You can buy some smaller ones to go around it for now to dress it up. I have empty pots on my front patio that I am slowly filling. It’s ok that it takes time. Also empty pots are easier to move around so don’t jump the gun with pots and plants. Buy the expensive potting mix, compost, mulch. DO NOT ever scrimp on soil, it is the foundation to a great garden.
Have fun. Remember it’s a concept, a feeling. This garden is yours so make it your own!
Inspiration from Instagram
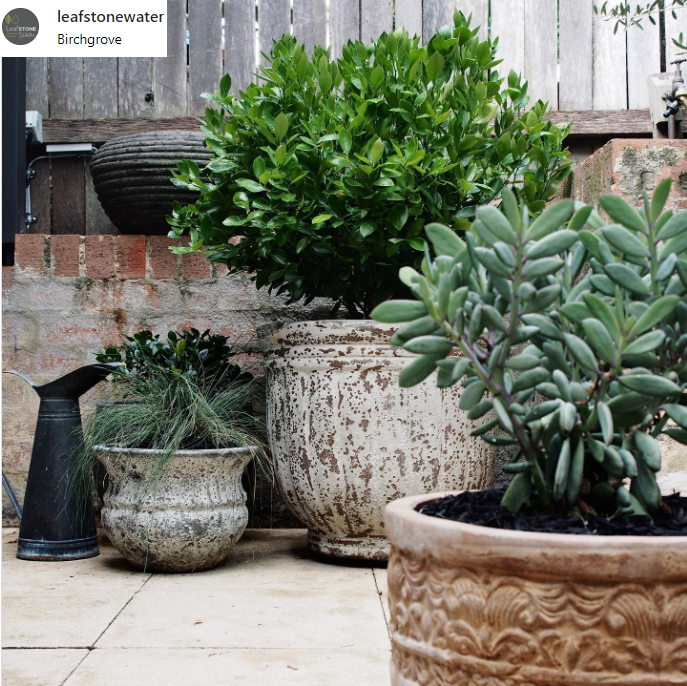
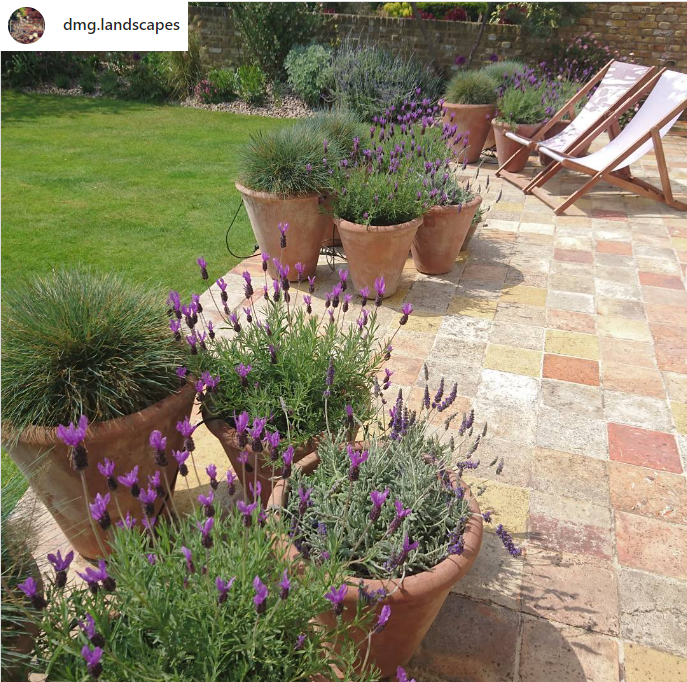
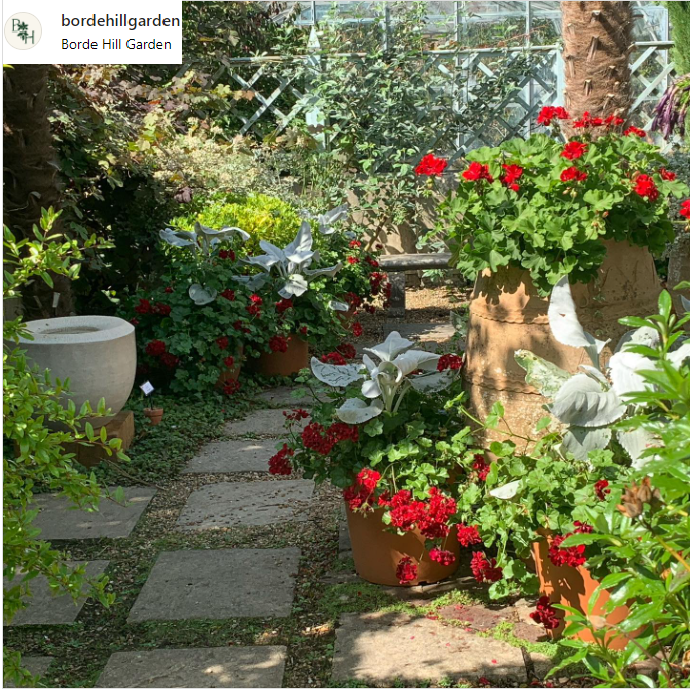
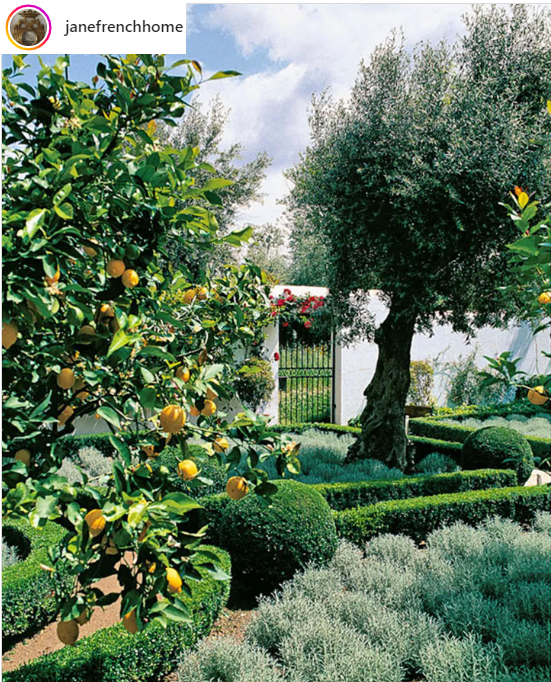
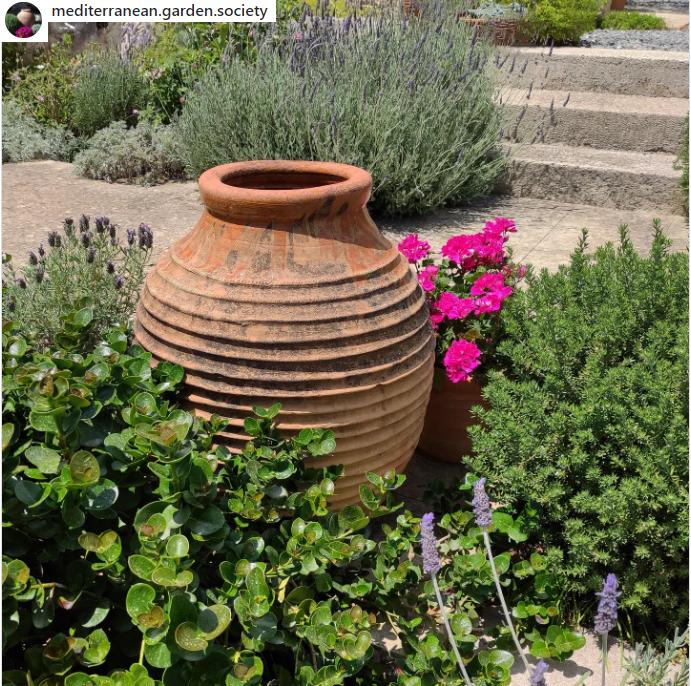
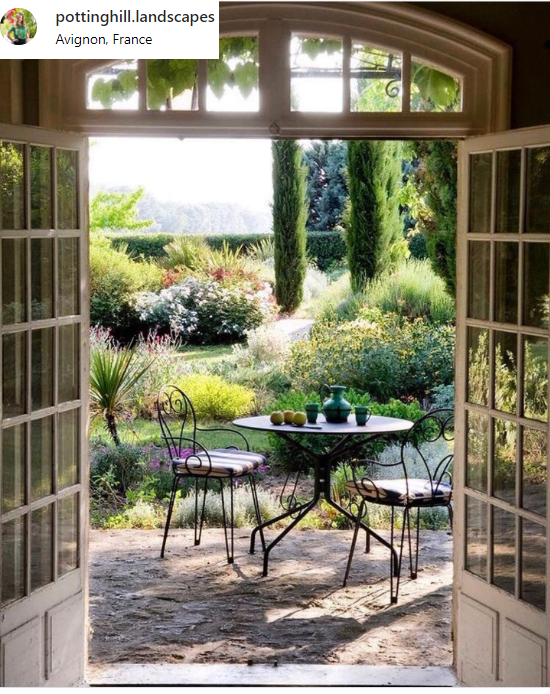
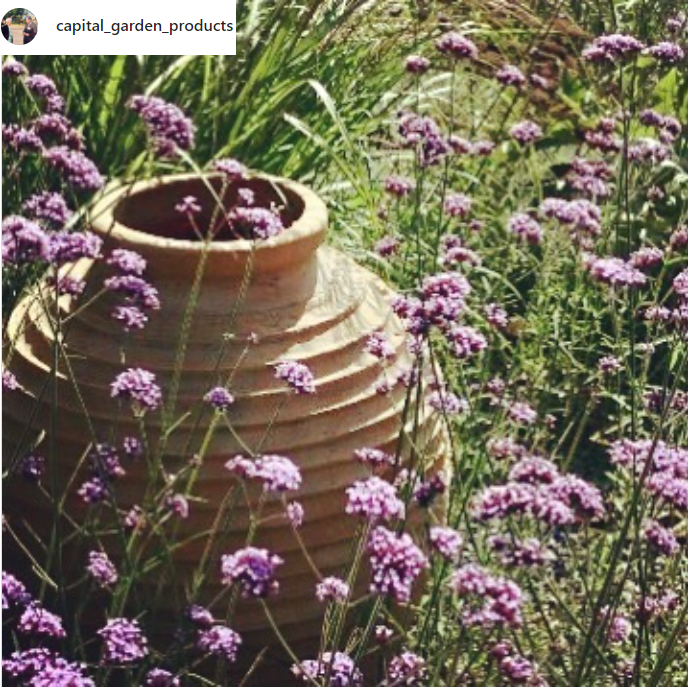
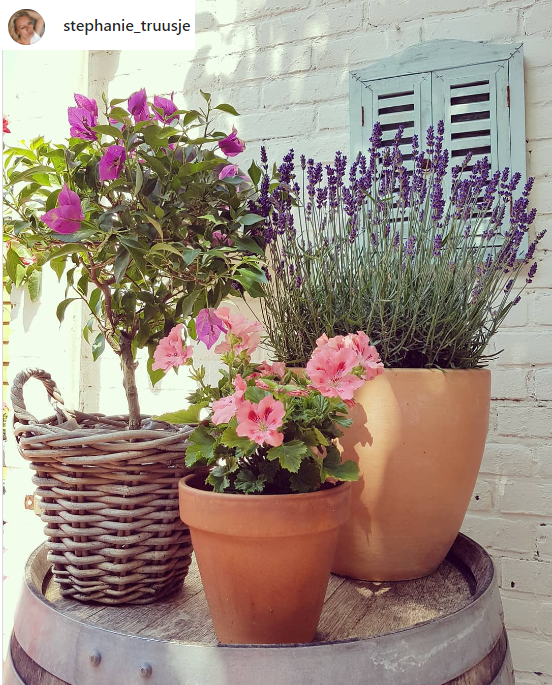
Some Plant Ideas for a Mediterranean Garden that suits the Ipswich Climate
Bay - Laurus nobilis
Lavender – French for longevity but can choose other varieties for pots
Olive - Olive 'Manzanillo' and Olive Helena grow well here.
Cypress - Prumnopitys ladei (Mount Spurgeon Black Pine), Gymnostoma australianum (Daintree Pine) and Juniperus conferta (Shore Juniper)
Rosemary – all forms grow wonderfully here
Citrus – most citrus grow wonderfully here
Bougainvillea – try a slow growing dwarf variety that you can contain by trimimg
Herbs - can be used in pots but don’t forget you can use Parsley as a loose border plant, thyme and oregano as a ground cover and even African Blue Basil as a boxed border
Blue Grass – Festuca glauca
Salt Bush - Atriplex nummularia
Salvia – perienal or annual
Geranium – Zonal and Ivy
Plumbago
Carissa Desert Star
Jasmine - Jasminum polyanthum
Star Jasmine - Trachelospermum jasminoides
Mandevilla – climbing and bush variety
Succulents for bowls or try dwarf Aloe Aloe varieties
Annuals like petunias
Cineraria Silver Dust - Jacobaea maritima
Pomegranate
Fig
Feijoa
Grapes - Pink Iona is a great variety for Ipswich

My List of Jobs to Do in September
Some inspiration to get you out in the garden this September
As spring bursts forth with its lively colours, it's the season when our gardens come alive with potential. Springtime signals a call to action in the garden, these are my crucial first steps to take as we wave goodbye to winter and embrace the time of growth and blossoms. From swapping out those fruit fly traps to giving our lawns some much-needed attention, and indulging in the satisfying trim, fertilise, and mulch routine, let's embark on a journey to transform our outdoor spaces into vibrant and thriving oasis.

Change my Fruit Fly Wick
As we kick off the new season, have you taken the time to replace the wick on your trusty Searles Fruit Fly Trap lately? As per recommendation, I switch out the wick every three months, aligning it with the changing seasons. I actually keep the trap active throughout the entire year because, believe it or not, even in Ipswich, those fruit flies can be surprisingly persistent, even when the weather cools down.
And if you're scratching your head wondering what fruit flies are all about or simply want to dive deeper into the world of this native pest, take a stroll through my blog.
Don’t do the Bindii Dance this Summer!
At the beginning of each season, especially Spring, I take the time to give my lawn some TLC. A healthy lawn with strong roots is not only easier to manage but can bounce back swiftly from water scarcity or a lawn grub invasion.
When my lawn isn't at its best, I keep a close watch for the tell tale signs of weeds, especially the notorious bindii. A thick and robust lawn naturally crowds out these intruders, sparing me the chore of constant weeding. My mowing routine always includes using a catcher, and if I have to resort to spraying, I do so before weeds have a chance to bloom and spread.
For more information on keeping your lawn looking good check out our Lawn Challenge
Repot or not to Repot all your indoor and outdoor potted plants?

Searles' Recharge Recharges old potting mixes
When it comes to repotting or potting up my plants, I consistently choose top-quality potting mix like Searles Platinum Premium Potting Mix. This exceptional blend incorporates key elements: a soil wetter to enhance water penetration, water crystals for improved soil water retention, and a dependable slow-release fertiliser to nourish my plants.
For situations where repotting isn't necessary or when I don’t want to repot, I rely on Searles Recharge® Sprinkle & Grow. This remarkable product rejuvenates potted plants and hanging baskets through a combination of controlled-release and instant fertilisers, along with the added benefit of Penetraide Re-Wetting Granules. These granules effectively prevent old potting mix from becoming hydrophobic, ensuring efficient water and fertiliser absorption at the root level. It's an excellent solution for reviving aging potting mixes, depleted soils, and budget-friendly potting blends, ultimately revitalising my potted plants.
Plant any fruit trees I can get my hands on
Planting season is in full swing, and I'm all about getting my hands on any fruit trees I can find! Whether it's figs, avocados, citrus, mulberries, guavas, kiwi fruit, persimmons, pomegranates, olives, or mangos, I'm putting them all in sunny, open spots. The goal? To let these trees take root and thrive before the scorching summer heat and dry spell hits.
Actually, scratch that—I'm up for planting just about anything I can get my hands on right now. This is the prime time to be out in the garden, getting your hands dirty. Whenever I'm doing any planting in my garden, I swear by Searles Garden Soil. Planting directly into this superb mix gives my plants the absolute best start in life.
So why are you still reading this? Get out there and get busy! Plant now, before it gets too hot, too dry, and just plain unpleasant. Your garden will thank you later!
Get the Vegetable Garden Ready

With the changing weather, it's that time again to prepare my vegetable gardens for new plants. Out go the winter vegetables, making way for enriching the soil with a hearty dose of compost and microbes. I always try to designate a corner of my vegetable garden to green manure crops, which I'll dig right back into the soil for an extra boost.
If you're new to vegetable gardening, I've got some quick tips for setting up a new bed that you can check out here.
Once the vegetable patch is cleared and the soil is enriched with compost, it's time to get those summer vegetables in the ground. Think tomatoes, beans, capsicum, carrots, eggplants, cucumbers, watermelons, pumpkins, squash, zucchinis, lettuce, and corn—just to name a few of the varieties perfect for planting now. I like to use a mix of seeds and seedlings, so my crops have a staggered growth. It's all about maximizing that garden yield!
Fertilise Strawberries and Herbs
If your strawberry plants appear to be in good health, it's a good idea to fertilise them with granular sulphate of potash. This will encourage a second round of flowering and fruiting, extending your strawberry harvest.
However, if your strawberry plants and other perennial herbs are showing signs of stress or are not as robust as you'd like them to be, it's time to give them a boost. Consider using Organic Link for overall soil enrichment, along with a high-quality liquid fertiliser like Triple Boost to provide them with essential nutrients for improved growth and vitality. Your plants will thank you for the extra care!
Fertilise and Trim
This is the ideal moment to encourage fresh new leaf growth and the formation of flower buds in your gardens and pots. Begin by delicately pruning away any old growth that has been affected by the cold or has become overly tall and spindly. Afterward, consider fertilising and soil wetting the soil.
Our preferred choices for fertilisers are Organic Link and Triple Boost, and we utilize both granular and liquid soil wetters to ensure your plants get the best care possible. Your garden will thrive with these steps!
Mulch
Mulch all garden beds and pots. It not only helps with water retention, it helps keep soil temperature even and encourages plant growth. Spread a 5 – 10cm layer of organic mulch around plants.
Seize the slighter warmer weather - get outside and enjoy.

Easiest way to use my Essential Oils
There are many ways to use essential oils - massage (with a carrier oil), baths, inhalation, compress but by far the easiest way is diffusion.
There are three main ways you can diffuse your essential oils - Candle Oil Burners, Aromamatic Electric Oil Vaporizer and Ultrasonic Diffusers. I believe the Ultrasonic Diffuser is by far the best and most economical.
Do you ever feel like you are so bombard with information that you can’t make a decision?
Happens all the time to me. I usually end up walking away never to make a decision.
Something that I find many people struggle with is “What’s the easiest, best and most economical way to use my essential oils?”
There are many ways to use essential oils - massage (with a carrier oil), baths, inhalation, compress but by far the easiest way is diffusion.
There are three main ways you can diffuse your essential oils - Candle Oil Burners, Aromamatic Electric Oil Vaporizer and Ultrasonic Diffusers. I think the names explain their effectiveness - Burners, vaporisers and diffusers…
Candle Oil Burners

Candle Oil Burner
Candle oil burners usually use a tealight candle to heat a dish with water and essential oil.
While the candle oil burners are the cheapest option, I find they can be dangerous as hot wax, flames and oils aren’t a good combination especially with children.
Also the heat from the candle and boiling water actually damages your essential oils and as the essential oil compounds are released at different stages you don’t receive the oil in their natural balance (you don't get the right scent).
There are also now electric versions of this style. You add oil and water to a vessel and turn the power on. There is a heating element that heats the water and the essential oils are released in the steam from the boiling water. Again the boiling water and heat can actually damage your essential oils and the essential oil compounds are released at different stages, you don’t receive the oil in their natural balance (you don't get the right scent). While this method is safer than the candle burner, I find it to be expensive (uses a lot of essential oils) and no where near as effective as other devices.
Aromamatic Electric Oil Vaporizer

The Aromamatic Electric Oil Vaporizer provides a safe and clean way to enjoy the scents of essential oils.The Aromamatic vaporizer operates at a constant minimal temperature, allowing gentle vaporization and eliminating the need to add water.
The Aromamatic Electric Oil Vaporizer provides a safe and clean way to enjoy the scents of essential oils. The Aromamatic vaporizer operates at a constant minimal temperature, allowing gentle vaporization and eliminating the need to add water.
At the top of the vaporizer is a bowl, this is the only part to emit heat, the body remains cool to touch and is safe to handle even when electrical power is turned on. No water is needed and the Aromamatic vaporizer can be left on even when there is no oil in the bowl. I find it is quite safe to use with three little people. While the bowl does emit heat it is not enough to burn wandering fingers.
The Aromatherapy Electric Oil Vaporizer, uses heat to vaporise essential oils much more subtly than candle burners but it still needs to use a lot of essential oils to be effective and just like with the candle burners the can actually damages your essential oils and the essential oil compounds are released at different stages, you don’t receive the oil in their natural balance (you don't get the right scent).
Ultrasonic Diffuser
I believe the Ultrasonic Diffuser is by far the best and most economical with three drops of essential oil lasting up to 8hrs. They disperse essential oils in their purest form and they can also act as an Air Purifier, Ioniser, Aroma Diffuser and Night Lamp.
I believe the Ultrasonic Diffuser is by far the best and most economical with three drops of essential oil lasting up to 8hrs. They disperse essential oils in their purest form and they can also act as an Air Purifier, Ioniser, Aroma Diffuser and Night Lamp.
Ultrasonic diffusers are filled with water & essential oils are then added to the water where they remain on the water’s surface (we recommend about 3-5 drops of essential oil).
Ultrasonic diffusers work by using ultrasonic vibrations! These ultrasonic vibrations are actually sound waves which vibrate at an ultrasonic frequency, which is a frequency the human ear cannot typically detect. These ultrasonic sound waves agitate the water causing the separation of the water particles. When the water particles are separated, they become negatively charged particles which are lighter than the air. This is the visible “mist” that you see when you use a diffuser. There is no heating element at all, just the ultrasonic wave technology, this enables the essential oils to be dispersed in their truest form for scent and therapeutic value. The essential oil particles are broken down into micro-molecules diffused into the air as negative ions. Negatively charged ions will attach themselves to harmful positively charged particles in the air & help to purify your home. Positive ions are always present because of electronics, plastic and other polluting chemicals in our environment.
All of our diffusers are ultrasonic.
Our diffusers feature two running modes, four hours continuous running time or 8 hours at 30seconds on/30seconds off. Most units have a light that runs independently of the mist. Choose your mist and light mode to customise your aromatherapy experience.
Our Ultrasonic Diffusers come with an automatic safety feature that ensures that the diffuser switches off once the water has depleted, so you can go about your day without the worry of a dangerous electrical situation.
Common Questions I get asked about our Diffusers?
Why can’t I smell the essential oils in the diffuser?
We all have this really cool ability that is called Smell Adaptation, Nose Blindness, Olfactory fatigue or Olfactory adaptation. Fancy words fo something that is a temporary, naturally occurring adaptation of your body that leads to an inability to detect or distinguish common scents in your surroundings. It can take you anywhere between 5 - 30mins to become ‘used’ to a scent. Sometimes when we diffuse the same scent over and over again and we stay inside right next to the diffuser we become blind to the scent. Also in large spaces the scent may not be as strong but it’s always lingering. Best way to overcome this is go outside for a while and then come back inside. Sometimes here at Trevallan certain blends can be smelt as you walk up the pathway into the shop but can’t be smelt inside. Some essential oils have longer lasting scents and some essential oils can be light and just tickle the nose.
Why do your diffusers only run for 4/8hours?
You shouldn’t diffuse essential oils continually. Robert Tisserand (founder of the Tisserand Institute, the leading organisation of research and education in the art and practice of aromatherapy) mentions that “Intermittent diffusion is much more effective, as well as being safer, than continuous diffusion. Intermittent means 30-60 minutes on, then 30-60 minutes off. This is because our body, especially our nervous system, habituates after this length of time. With continuous diffusion, while benefits do not increase, there is evidence that the body becomes stressed in various ways.” He does go on to mention though that small amounts of essential oil in the diffuser (scent is barely noticeable) is fine for any length of time. Lets be honest though, we are diffusing the essential oils so we SMELL them, so this is why we recommend diffusers that don’t run for large lengths of time.
Can I use Fragrant Oils in your diffusers?
No. Fragrance oils are different from essential oils and in my opinion should never be used in a diffuser. Fragrance oils are synthetic, which means they contain chemicals that aren’t naturally occurring. They are made in a laboratory with different chemicals to represent a scent. They are usually also mixed with a base oil such as vegetable oil. Now personally the last thing I want to be doing is inhaling vegetable oil and a chemical cocktail but each to their own!
You also can’t use essential oils that are mixed with a base. This could be a pre made massage oils, room sprays or even a pure essential oil that say 3% or something like that. For example you can sometimes buy expensive oils that may say this on it’s label Jasmine 3% Essential Oil. This means in a 10ml bottle there is 0.3ml Pure Jasmin Essential Oil and 9.7ml grapeseed carrier oil.
If I really want to ‘smell’ my oils shouldn’t I use a Nebulising Diffuser?
This is a personal decision. I think the Nebuliser is a fancy way to waste your essential oils. A nebulizing diffuser works like a perfume atomizer. A small air pump blows air across a small tube creating a powerful vacuum that pulls the essential oil from the bottom of the tube to the top in a fine spray, so the mist is entirely composed of the essential oil. To me it sounds like someone spraying their most expensive perfume around a room every few minutes. It’s a personal decision.
Trevallan stocks all of the above diffusers and vaporisers and is a proud stockist of Australian Perfect Potion essential oil blends range.

What Seed Do I Buy
Buying open pollinated, no chemical treatment, bio dynamic seeds is ‘the best option’ for starting your thriving vegetable garden. We have chosen Eden Seeds as they are a great Australian company with an ethos we align with. They stock both Organic and no chemical treatment, Bio dynamic seeds and we try to stock a good range of both.
When we bought Trevallan nearly 24 years ago our experience with seeds was minimal.
My grandfather always reused his own seed and that was considered normal.
When we bought Trevallan we had three different seed companies in stock and within a few short months most of our complaints came about due to seed issues.
So started a research project into something entirely new for us, using customer recommendations and my grandfather as our test subject!
Very quickly we converted to Eden Seeds.
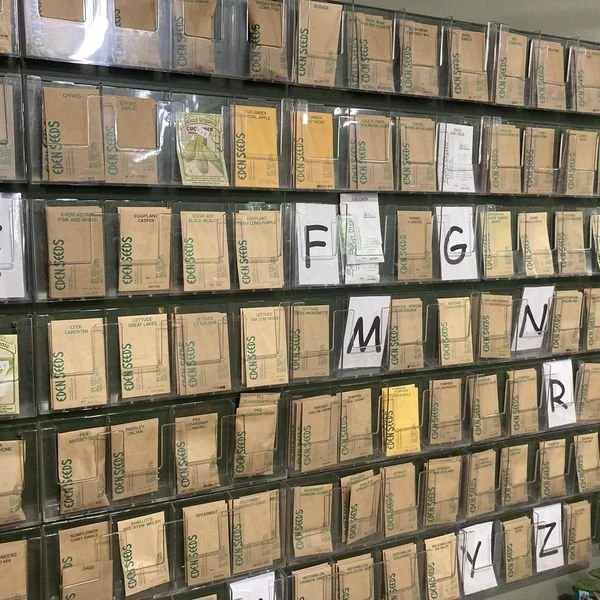
Very quickly our seed problems diminished and demand for seeds grew until now where we have the Great Seed Wall!
So what were our problems with some of the seeds we used to stock.
Low germination rates (by experienced growers)
What grew wasn’t exactly the same as what it was marked as
Problems with growing past a certain point
Major problem was not being able to collect seed reliably for future cropping. This was something my grandfather always did. It was very important
We discovered Eden Seeds. Eden Seeds states “aim is to distribute old traditional open pollinated varieties of vegetable seed, preferably old Australian varieties and organically or bio-dynamically grown where possible. We believe they are more nutritious and better tasting, hardy and easier to grow for the home gardener. Old varieties produce over an extended period. Home gardeners obtain relaxation, enjoyment and quality from a most rewarding hobby. Our seeds are the old traditional open pollinated non-hybrid varieties and have no chemical treatment, and no genetic engineering.”
This sounded great to me but first I needed to understand what that all meant!
Hybrid Seeds
Hybrid seeds are produced through careful pollination of two specific varieties by human intervention. Normally, this highly selective plant breeding is done to bring together two traits in each of the chosen varieties so that the resulting seed has both of the traits
An example may be a cabbage that grows huge but is susceptible to disease. A smaller-growing cabbage is very disease resistant. They combine the two and boom a large cabbage head that is disease resistant. Usually, you can’t reseed these plants as the seeds may not contain the characteristics of the hybrid plant.
Positive of Hybrid Seeds Hybrid seeds are believed to have better disease resistance and perform better in terms of more fruits, flowers and vegetables produced.
Negative of Hybrid Seeds Hybrid seeds tend to be more expensive to buy due to the specialized pollination process and the seeds you collect from them will not grow the same plant next year and, in some cases, have been bred so that no plant at all can grow from the seeds of a hybrid plant.
Non-Hybrid
Non-hybrid seeds, or open-pollination seeds, are naturally pollinated naturally (bird, insect, wind). They come in a wealth of different varieties and produce seeds that grow into plants with similar characteristics as the original plant. Over successive generations, non-hybrid plants may also adapt to local growing conditions, making them stronger plants, and ultimately less susceptible to local pests and disease.
Using non-hybrid seeds has another advantage: you’re helping preserve the biodiversity of our food supply. Many of the rarer “heirloom” and “heritage” seed varieties would be extinct were it not for the efforts of non-hybrid gardeners and farmers
Genetically modified organisms (GMO)
GMO seeds are produced by genetic engineering, altering the genetic material of an organism. This is different from hybrid seeds that are produced by cross-breeding of two varieties through artificial mating
Organic vs Non Organic
You can buy Organic hybrid seeds and organic non hybrid seeds You can not buy organic GMO seeds. Many people tell me that they buy their fruit and vegetables organically so they just reseed their garden from that. You can buy hybrid organic vegetables and seed. This means while your seed is organic your vegetables may not regrow true to the plant you purchased.

Australian Organic Laws are very strict, always look for the Australian Organic Certification stamp when buying organic products. In Australia, the Australian Certified Organic (ACO) standards require organic seed producers to use organic practices and to undergo an annual certification process. The certification process for organic seeds involves ensuring the land is free from synthetic chemicals, using organic methods for seed production, and processing the seeds without synthetic chemicals.
No Chemical Treatment
Untreated seed is classed as ‘clean’ seed and has not been treated using any chemical, biological, or physical method. While untreated seed can be grown under organic conditions, the seed crop was not grown under Certified Organic Conditions. As the Certification process can be lengthy and costly many farmers choose the no chemical treatment option. Untreated seed is a popular alternative to organic seed.
Bio-dynamic
Bio-dynamic seed crops are grown in living soil within a diverse thriving ecosystem. Not a sterile environment such as under growing houses or single crop acres. Seed produced from this growing environment is bred to thrive in organic/bio-dynamic growing conditions.
Best Seed?
A lot of information to cover there but as you can see buying open pollinated, no chemical treatment, bio dynamic seeds is dare I say it ‘the best option’ for starting your thriving vegetable garden.
Eden Seeds
We have chosen Eden Seeds as they are a great Australian company with an ethos we align with. They stock both Organic and no chemical treatment, Bio dynamic seeds and we try to stock a good range of both. Our Great Wall of Seeds is constantly changing and evolving to supply you with not only the best seed but the best diversification so we all aren’t stuck growing just beans!
Choosing what seed to grow… Well that is another story!

How Do I choose what Seeds to Plant?
Sharing my vegetable gardening experiences with you so hopefully you don't make the same mistakes as me.

Me looking extremely perplexed about what to plant!
I remember reading my first ever Eden seeds catalogue. I think I had ever second seed variety highlighted. We were going to grow five different types of beans … I hate beans... I think I thought if I grew them, I’d eat them!
What I ended up with was a seed draw full of seeds, an over grown vegetable patch and too much produce all at once.
I’m a little bit wiser now, little bit!
I thought I’d share some of my vegetable gardening experiences with you so hopefully you don't make the same mistakes as me.
My first piece of advice is realising I am not Annette McFarlane, Claire Bickle, Jerry Colby-Williams or Jamie Oliver. Yes, I want to plant all the edibles but really am I going to cook, preserve and then eat all the edibles. Do I even have the space, time or know how?
Realisation, I do not enjoy cooking or preserving. Nor do I have the capacity to store a lot of those things.
I need to make sure I plant mainly what I can eat and cook with and maybe one different thing every season to broaden my horizons
Some of you think you want to cook and preserve but just make sure you’ve attempted this before or at least know what’s involved. Thinking you are going to be that person that makes a huge batch of tomato sauce or chutney, is a lot different to the person who is in a kitchen doing it all day long. I did this as a child with my grandmother and I hated it, as an adult I gave it another go and hated it.
I realised my passion was in eating not cooking! I now surround myself with a lot of happy chefs in my life that willing take the food I grow and magically turn it into yummy things in jars for me to eat!
I need to successive plant. Planting 12 lettuces isn't the best way forward for me. I’m not even sure I know 12 people to share 12 lettuces with. It’s better if I plant four lots of lettuce. Sowing some seeds every month so I have a continuous supply and not everything all at once. Unless you like lettuce soup!
To work out what to plant, I first work out what I eat a lot of. I then work what is really cheap at the stores when in season. For example we eat a lot of broccoli but by the time I get a good crop of broccoli, it's readily available at the shops and it’s a good price. Broccoli takes up a lot of space in the garden and can be hard to get a good crop so I leave that one for the professionals. On the other hand we eat a lot of tomatoes and they are never cheap, nor do they taste any good so that something I will definitely grow. Once I work out my basic favourite things to eat and grow I always like to throw something a little different into the mix. Maybe we love Silverbeet but instead of growing green silverbeet we grow rainbow silverbeet.
I always love to choose a vegetable that sounds yummy but I haven’t incorporated into my food before and grow that too just to see what it’s like.
Buy good quality non hybrid seeds or good quality established plants from known growers. Try really hard not to grow things from scraps.
If I’m really struggling with what to plant one season, I grow herbs. I can always use herbs, herbs are easy to grow and herbs are easy to share with friends.
Start small, then go big. Unless you have the time, energy and skills start small. There is nothing wrong with planting three edibles. There is nothing wrong with planting ten edibles. It doesn't matter. What matters is that you are doing it.
Finally my biggest piece of advice is don’t scrimp on soil. Soil is the key to a healthy garden. Buy the good soil, make the good soil. Have organic fertiliser on hand and use it. Healthy soils make plants thrive not just survive. Growing your own food can be so rewarding but follow the steps and get good advice.
Always remember There are no gardening mistakes, only experiments. – Janet Kilburn Phillips!
One Potato, Two Potato, Three Potato
Grow your own potatoes from certified organic seed. Did you know that 29 pesticides are commonly used when growing potatoes?
The first time I heard the words seed potato I imagined a packet of seeds looking somewhat like bean seeds! How wrong I was. Seed Potatoes are what you use to grow potatoes and look like baby potatoes. About 1kg of certified seed should produce about 10kgs of potato.
Woolworths sells potatoes for around $1kg sometimes, why am should I grow them myself?
Potatoes rank among the most contaminated with pesticides and fungicides. Twenty-nine pesticides are commonly used, and 79% of potatoes tested exceed safe levels of multiple pesticides (according to research done by FDA and USDA). Now I don't know about you but I used to use potatoes all the time in cooking. So this little piece of information didn't sit terribly well with me. If I started buying organic potatoes it would cost me upwards of $6kg. So growing potatoes seems like a good idea.
Why should I buy certified seed potato, why can’t I just plant the sprouts that grow from my potatoes from the grocery store?
Firstly potatoes are sprayed with growth inhibitors to stop them from sprouting in shops? This means that when they do finally sprout the growth may be inhibited. You may get weak growth, deformed growth or a plant more susceptible to insect and fungus attack.
Potato plants can carry many potato diseases: bacterial, viral, and fungal; and some of these are passed on through potato tubers. Plant viral infections are persistent and can not only affect your potato plants but your neighbourhood’s plants as well. All plants in the potato family can be affected like tomatoes, eggplants and chillies. These diseases can also contaminate soil and make an area implantable. Remember the Great Famine? Caused by potato blight!
If using non certified seed potatoes the chance of having a disease outbreak is increased. This is because the appearance of a growing potato crop, or the harvested tubers, is not a reliable guide to the pathogen level in the tubers. For example, late season viral infections may not be apparent until the next season’s crop is growing. So give your vegetable patch a little TLC and start with healthy certified seed.
The varieties of certified seed potato seem endless – Dutch Cream, Sebago, Pontiac and Desiree are just a few. There are red ones, pink ones and even blue ones! Some are good for boiling or mashing, some are better for baking and frying, there are even some that are perfect for microwaving! Some are all-rounders. How you like your potatoes cooked is how you choose which variety to grow.

Some of my potatoes one year
Potatoes prefer a sunny, well-drained position and rich, fertile soil. Try not to plant them in the same spot where potatoes, tomatoes, capsicums or eggplants have been grown recently, as they are all in the same family. Ideally, rotate that area for around three years.
In cooler climates, potatoes are often planted 2–3 weeks before the last frost. In Ipswich, we don’t usually have to work around heavy frost, so I tend to plant mine in June/July when the weather is cooler.
Seed potatoes are best planted once they have short shoots around 1cm long. If you buy your seed potatoes in May or June, this usually takes about four weeks.
Large seed potatoes can be cut into two, three or four pieces, as long as each piece has a good eye or shoot. The cut surface should be left to dry for a couple of days before planting. Personally, I don’t usually cut mine, as I haven’t had as much success with pre-cut potatoes.
The principle for growing potatoes is the same whether you grow them in the ground or in pots.

Potatoes in the Ground
1. Plant certified seed potatoes into shallow trenches in loose, free-draining soil. I like to use good quality compost with some sugar cane mulch mixed through, so the soil stays open rather than heavy and compacted.
As the plants grow, keep adding soil or compost around the stems until the mound is roughly 20cm above the original soil level. This is called hilling. Potatoes form close to the surface, so covering them helps stop them being exposed to light and turning green. Green potatoes can upset the stomach, so they are best avoided. Hilling can also encourage a better harvest.
2. Harvest when the lower leaves start to yellow. You can gently dig around and harvest only what you need, leaving the rest of the plant to keep growing. If you want to harvest and store the crop, cut the tops off and leave the potatoes in the ground for another 2–3 weeks before digging.
I have had some potato plants that I harvested from continuously through the season, and others that I left to harvest all at once. In my experience, neither method affected the final result too much.
Dug potatoes should be kept in a cool dark spot.
Good luck and just think how amazed your friends will be when at your Summer pool party you have blue potato salad!
Some varieties of Potatoes Trevallan stocks
The last few years of increment weather around potato season has led to many varieties either being only available in small quantities or just not at all. This year we have a limited supply of Sebago, Dutch Cream and Desiree plus a few newer varieties
Sebago
A long to oval shaped all-rounder with white flesh and skin that’s common in supermarkets and green grocers around Australia. This potato is great for boiling, mash, roasting, baking, chips and mash.
Dutch Cream
Dutch Cream, from Holland, are perfect for frying or serving cold in a salad. Their creamy flavour means they are one of the few waxy varieties that work in a mash as well.
Nicola
Nicola have a low GI rating, with a yellow buttery flesh. They are a firm potato and will hold its shape after boiling, making it perfect for salads. They make a dense creamy mash and good roasted if you part boil; as this will make them crisp up easier.
Kennebec
An old-fashioned variety that has been in Australia for many years. It’s origin from the USA. Loves to be Baked, Roasted or Fried. Have heard its great for the BBQ or pizzas.
Desiree
Red-skinned, yellow flesh with a distinctive flavour. Originally bred in the Netherlands in 1962. Has great resistance to drought, and is fairly resistant to disease. Best used for roasting, baking, and boiling
Pontiac
A very reliable all-rounder with pink skin and white flesh. Great to boil, bake, roast, microwave and mash but not so suitable for frying.
Kipfler
A waxy, finger-shaped, knobbly potato with yellow skin and a light yellow flesh with a buttery nutty taste that is great boiled, steamed, in salads and roasted but not recommended for frying or chips.
Salad Rose
Features a red skin with yellow flesh. Salad Rose is excellent for salads, steaming, boiling, roasting and mashing. Very good for Soups and stews as it won't break apart once cooked.
Sapphire
Has unusual purple skin and flesh. Like all darker coloured veggies Sapphire is packed full of antioxidants. The colour is maintained even after cooking. Great all rounder potato, suitable for salads, boiling, mashing, roasting and chips.
Avanti
An early white potato bred in the Netherlands. A good all-rounder for boiling, roasting and chips.
Delaware
An Australian-bred variety known for reliable crops. Great boiled, steamed, roasted or used in salads.
Imperial Blue
An Australian-bred gourmet potato with striking purple-blue skin and flesh. Beautiful roasted, as wedges or in colourful salads.
Red Lady
A smooth red-skinned potato with creamy flesh. A lovely all-rounder for roasting, baking, boiling and warm winter dishes.
Rodeo
A reliable variety with creamy flesh and good storage qualities. Useful for roasting, baking and mashing.

Extreme Weather Plant Protectants
When the weather swings to either extreme, freezing mornings or relentless heat, I put a protective coat on my plants. For me, that coat is Silica and Potash or Envy.

Hopefully my silica and potash spray works better than using my good coats
Once the cold mornings start, I feel like I should be going out and putting a big winter coat on some of my plants. In summer I want to go put a big Sombrero on all my plants.
The reality is, plants don’t just struggle in cold conditions, they also suffer through heat, dry winds, intense sun and sudden temperature swings. In Ipswich, it’s often not just cold or just hot, but the constant stress of moving between extremes.
We don’t have a big coat and hat for our garden so there are two products that work like a protective layer in both hot and cold conditions, Silica and Potash and Envy.
How does Silica and Potassium help with Extreme Weather Protection?

Silica and Potash by Plant of Health is product we use at Trevallan
Silica (Si)
Role in Protection:
Cell structure strengthening: Silica deposits in plant tissues strengthen cell walls, helping prevent cell rupture caused by ice crystal formation in cold conditions and cell collapse or scorching during extreme heat.
Stress tolerance: Silica improves overall stress tolerance by helping plants regulate internal processes more efficiently, increasing resistance to cold stress, heat stress, drought and rapid temperature fluctuations.
Water retention: Silica helps plant cells retain water, buffering against dehydration caused by freezing temperatures as well as moisture loss during heat, dry winds and high evapotranspiration.
Potash (Potassium, K)
Role in Protection:
Osmoregulation: Potassium regulates water movement within plant cells, helping maintain cell turgor pressure. This reduces the risk of cell damage during freezing conditions and helps plants stay hydrated and functional during heat stress and dry conditions.
Enzyme activation: Potassium activates enzymes involved in metabolism and stress response pathways, allowing plants to better manage cold stress, heat stress and environmental extremes.
Carbohydrate movement: Potassium aids in the transport of carbohydrates throughout the plant. In cold conditions, these carbohydrates can act as natural antifreeze agents, while in hot conditions they support energy availability, recovery and stress resilience.
Combined Benefits of Liquid Silica and Potassium for Extreme Weather Protection
Silica is often more effective when applied as a foliar spray. This is because silica is less mobile in the soil and can be better absorbed directly through the leaves, allowing quicker and more targeted uptake by the plant.
The same applies to potassium, foliar feeding provides a rapid way to deliver potassium to plants, particularly during critical growth stages or periods of environmental stress.
Together, silica and potash support plants through both cold and hot weather extremes by improving the physical and biochemical stability of plant cells. Stronger cell walls, improved water regulation and more efficient internal processes help plants cope with frost, heat stress, drying winds and sudden temperature fluctuations, while also improving overall plant health and resilience.
At Trevallan, we use Plant of Health’s Potash and Silica (certified organic and safe to use across your whole garden). I liquid feed the garden centre about once a month with this product. I add the liquid fertiliser to Birchy, and the entire garden centre is fertilised in around 20 minutes.
What is Envy?

Envy is a frost protectorent and anti transpirant.
Envy is a frost protectant and anti-transpirant that supports plants through both cold and hot weather extremes.
Envy is designed to prevent frost damage by providing a physical and/or chemical barrier that reduces ice nucleation, the process by which ice crystals begin to form from supercooled water, a key factor in frost damage on plant surfaces.
Once sprayed over a plant’s foliage, Envy can increase frost tolerance by up to 4°C.
The same protective film also helps plants during hot, dry and windy conditions. Envy can substantially reduce moisture loss by up to 50%, helping to protect foliage from sunburn, windburn and dehydration during periods of heat stress.
Envy does not hinder plant growth or photosynthesis. It forms a semi-permeable membrane over the leaf surface that still allows the plant to breathe. It is non-toxic, pH neutral, and will biodegrade in sunlight.
Envy is best applied as a foliar spray and should be reapplied as new growth emerges to maintain protection during changing conditions.
Both products ‘Silica and Potash’ and ‘Envy’ can be applied as a foliage spray - mix the product with water and spray over the plant’s foliage.
Both need to be applied regularly for best results.

ARK & C WoodWorks
Timeless Woodcarvings & Sculptures from Rare Recycled Timbers

ARK & C’s motto is to "make timeless woodcarvings and sculptures from rare recycled timbers."
Each piece is crafted with love and is truly unique, with its own story to tell. Kevin can share the history of the timber, including the age of the tree, where it was logged (or found fallen), how he acquired it, and the inspiration behind its use.
Kevin's interest in the history of the ranges was sparked when he first began wood carving many years ago. While searching for suitable timber, he became aware of the hardships and challenges faced by the early timber getters and settlers.
Determined to learn more about these pioneers, Kevin reached out to as many of their descendants as possible over the years.
This rich history is captured in Kevin’s three books, which are filled with family stories and documented history. The first timber men sought the most valuable timber from the highest mountains to the steepest valleys, and Kevin has diligently recorded their stories for future generations to appreciate. His third book, "Slab Hut and Split Rail Fence," details the history of Rosevale, Mt Walker, and the first Irish families. This book is particularly dear to me, as my family, the Jensens, were among the first Danish settlers in Rosevale, and my great grandfather’s family is mentioned throughout.

When Kevin brings a new piece into the store I can’t help but write a love letter about them. I enjoy the feel and the emotions every piece evokes in me. If you are wanting to buy a piece of history, something that you can turn into a family heirloom then Kevin’s pieces are you.
All Kevin’s pieces are aviable instore you can see them via our Facebook Page or under Meet the Maker in our shop

Balancing your Chakras
Explore the art of chakra balancing and discover how essential oils can harmonize your body, soul, mind, and spirit. Learn tips, techniques, and products to enhance your well-being.
It is believed that everyone possess 7 bright, concentrated spirals or ‘wheels’ of energy known as chakras. The function of the chakras is to keep the spiritual, mental, emotional and physical health of the body in balance. Sometimes though these spinning wheels can become stagnate and the energy flow stops. Any kind of physical, mental and emotional stress can lead to stagnation. By balancing our chakras we can create harmony and balance of our body, soul, mind and spirit. When we awaken and balance our chakras, we unleash the potential to live a rich and vibrant life.
Tips to help Balance your Chakras

Diffuse the Essential Oil Blend associated with the chakra you are trying to balance. See what essentials oil blends are connected to your Chakras here. If you just feel that you need all your Chakras balanced try Chakra Balancing Essential oil blend. When added to a diffuser it can help balance the mood in the room, create a harmonious atmosphere and a balanced disposition.

Chakra Balancing Massage Oil
Give yourself a mini massage with Perfect Potions Chakra Balancing Massage Oil. Release any tension with this grounding, hypnotic blend of 25 pure essential oils in a sweet almond oil base, including frankincense, sandalwood, ginger, sweet orange and juniper. This divine massage oil can also be used as a body oil after a warm shower or bath to nourish and hydrate the skin. Allow any negative energy from the day to totally dissolve. Feel yourself coming back to your centre as you rebalance.

Rub (if possible) the areas associated with the out of balance chakra with Perfect Potion's Chakra Balancing Balm. For example as the root chakra is associated with the legs and feet, massaging these areas with the balm would be beneficial. The balancing balm contains a specially selected synergy of 23 essential oils aimed at balancing and centring each and every chakra.

Chakra Balancing Mist
Mist your body with Perfect Potions Balancing Mist to set the mood or clear the space before your yoga or meditation practice. You could even wear it as a perfume to evoke positivity and harmony. Chakra Balancing mist contains sweet orange, bergamot, lavender, ylang ylang, geranium, mandarin, cold pressed lime, patchouli, frankincense, Atlas cedarwood, clary sage, vetiver, rosemary, cypress, rose absolute, Australian sandalwood, ginger, juniper berry, may chang, neroli, sage, everlasting, jasmine absolute, pink lotus absolute and rose otto pure essential oils.
Visualise the colour associated with the chakra over the chakra. For example if your base chakra was out of balance you'd envision the colour red glowing brightly at the base of the spine, where this chakra is located.
Yoga. Yoga in general is great for balancing the chakras but there are specific moves that can be done for each chakra.
Get outside, take your shoes off, feel the earth. Relax in that moment.
Dance and Sing. I don’t care if you “can’t sing and dance.” Close the door, move your body and chant. Mindfully moving is a powerful form of meditation and sound can help create vibrations in the body that lead to harmonization. The mantra sound that corresponds to each chakra in order is LAM. VAM, RAM, YUM, HAM, AUM and OM
Get a Chakra Balance with Lorelle from Dimensional Healing in our Mystic Garden

In Aromatherapy and Chakras: Balancing your body’s energy centres for optimal health and wellbeing, Salvatore demystifies the origins of the chakras. He shares with you his personal journey into the chakras and provides you with his interpretation of how we can use chakras to reconnect our body, mind and spirit. Author: Salvatore Battaglia
Chakras are both complex and fascinating if you would like to learn more about the health of your chakras, you can honestly and openly answer this quiz. You can also buy Salvatore Battaglia Aromatherapy and Chakras Book in which Sal demystifies the origins of the chakras and shares with you his personal journey into the chakras and provides you with his interpretation of how we can use chakras to reconnect our body, mind and spirit.

Planting Sweet Peas
Sweet Peas are a fragrant spring flowering annual, native to Italy. They have one of the most enchanting flowers, delicate and fragrant, perfect in garden or admired in a vase. Learn how to grow Sweet Peas in Ipswich.
Sweet pea flowers from The Mountain Man
Sweet Peas are a fragrant spring flowering annual, native to Italy. They have one of the most enchanting flowers, delicate and fragrant, perfect in garden or admired in a vase.
Tradition dictates that March 17th (St Patrick's day) is the time to plant Sweet pea seeds. Have you ever wondered why?
Planting PEA seeds on St Patrick's Day is an old American tradition. As you will need the 'luck of the Irish' to get plants to grow while there is still snow on the ground!!!
For us here in Australia, we still follow this tradition because lets be honest here in Ipswich we need the 'luck of the Irish' to get sweet peas flowering and looking good. Normally, March is still too warm to start our winter gardens here in SE QLD.
Instead I use time as a reminder to prepare my soil.
Noel Burdette used to live here in the Ipswich region. Years ago he offered me this great advice about preparing the soil for Sweet Peas. This information is for sweet peas but can be applied to any peas.
Noel's Sweet Pea Advice
Sweet peas like a full sun position in the garden with plenty of airflow to minimise any fungal concerns.
They also enjoy a slightly higher level of pH in the soil, somewhere between 7.5 - 8.5. You can adjust your pH by applying a generous amount of Dolomite (provide much needed Magnesium) or a light dusting of Lime (as the calcium content is important).
They love well composted soil. We use Searles Compost but a little well aged sheep, cow or chicken manure worked into the soil would also help to encourage good drainage, yet adequate moisture retention.
Usually around mid April is a good time to plant out your seeds or the first quarter moon after St Patricks Day. Noel recommends to soak them overnight in a little water with a small amount of Condi's crystals (usually get this at a chemist) as this will encourage a higher percentage of germination.
After planting the seeds in the ground, water them in once and don't water again until they are "up and out "of the ground.
Pinch out any lateral growth in the early stages as what you're looking for are strong, upright plants that will then branch out as they get older and provide long lasting, fragrant blooms from late winter and into spring.
Fertilise your Sweet Peas with Organic Link when first growth appears and then alternating fortnightly between Triple Boost and Silica and Potash Liquid fertiliser.
Sweet Pea Fragrant spring flowering annual, used as cut flower, native to Italy
All sweet peas are climbing. Some are dwarf climbers (only grow to about 50cm) and others can grow to over 2m.
With all types of sweet peas, ensure they have somewhere to stretch their tendrils (fences or tepees) or maybe try them in a hanging basket and let the tendrils hang down.
Trevallan stocks Eden Seeds (non-hybrid open pollinated old fashioned seeds) Sweet Peas and Pohlmans Sweet Pea Seedlings. This year we have two choices in the seeds and the seedlings. The seedlings aren't usually available until April.
Bijou, Dwarf (seeds and seedlings)
Early Gigantea, mixed colours to 3m high, early flowering (seedlings only)
Spencer Choice Mix, The classic English sweetpea, 1902 release developed from Earl of Spencer's garden, climbing (seeds only)
Come into Trevallan and we can help you on your Pea Journey. Good Luck.